")
South Africa and stargazing have a particularly long history but there’s a time and a place for everything. That time is winter, as well as a chunk of autumn and spring. This is when atmospheric conditions tend to be most favourable in this country.
If you’ve ever felt the desire to spend time out among the stars, you’re joining a South African tradition that goes back hundreds of years. Even better, you’re also partaking of a tradition that goes at least as far back as the Assyrian and Babylonian empires. And just like the ancients didn’t need much in the way of equipment, nor do you.
Mark One Eyeball
Astronomical observations took place for millennia with little more than the human eye doing the work. Of course, there wasn’t much in the way of light pollution back then. It wasn’t until the invention of the telescope in 1608 that humans started using magnifying instruments (that we’re aware of). But that means that there’s a long history of human beings just…. looking at the sky. You know, stargazing.
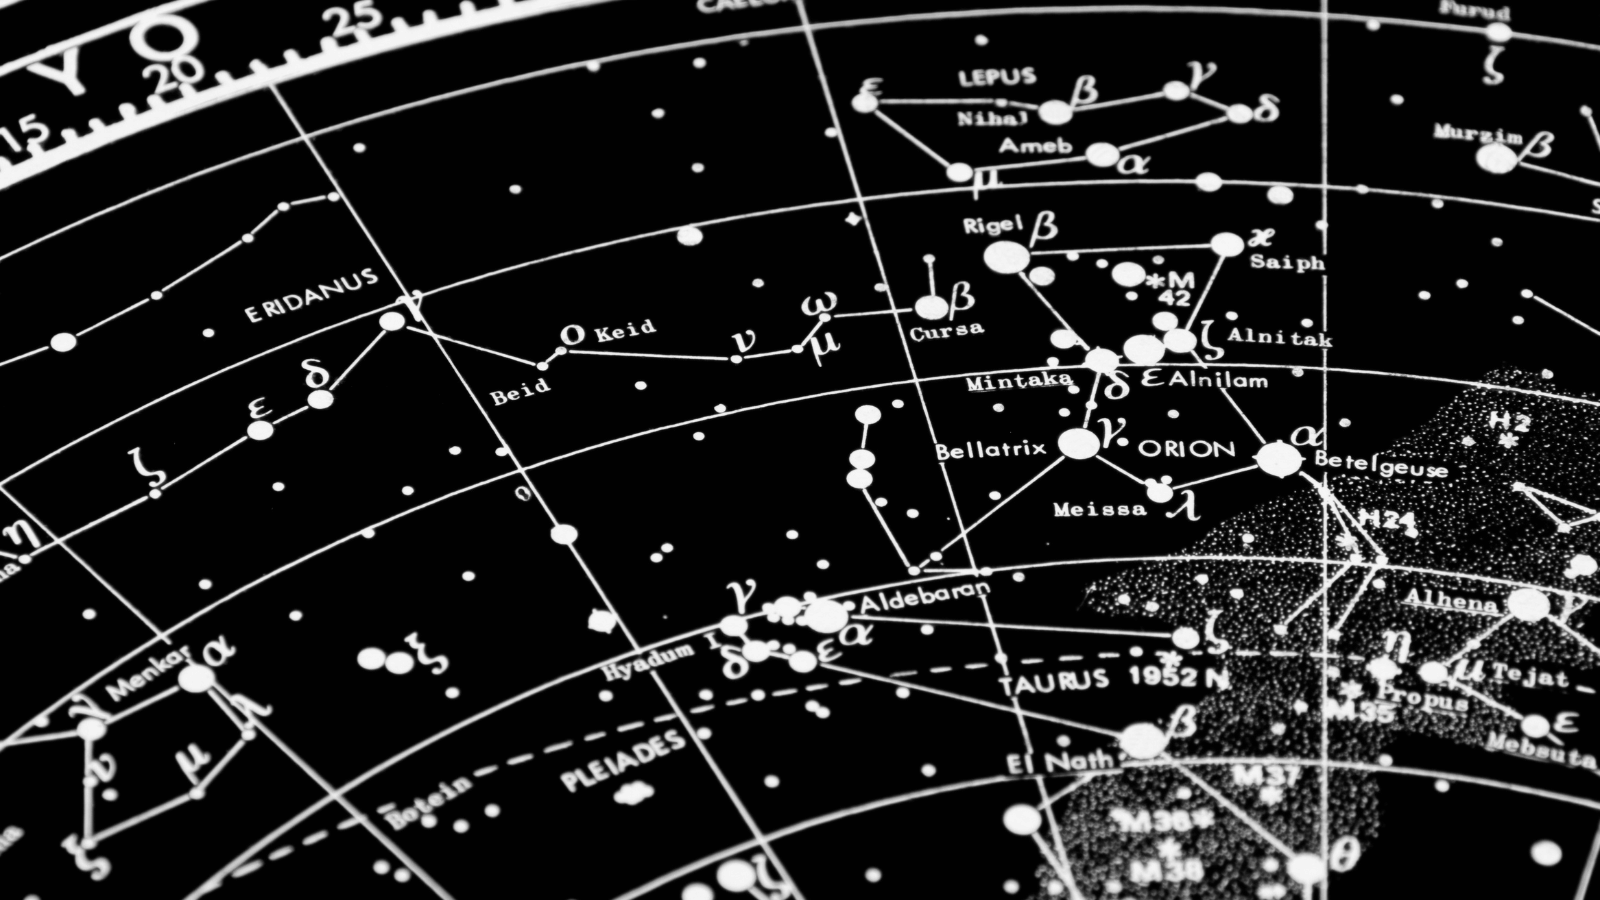
To begin, you need an interest and a general idea of what you’re looking at. Happily, astronomers are a friendly sort. Most are perfectly willing to do the more difficult work for you. Both the Wits Planetarium and a website called Sky Maps offer free monthly maps of the skies in the Southern Hemisphere.
The former is more locally targeted while the latter is broader. Sky Maps also lists which objects are best seen with which instrument. Yes, including the human eye. Sirius and many of the brighter stars are always on the list but if you’re in the right Bortle location, you’d be amazed at what’s visible. The ancient Egyptians, on the other hand, wouldn’t have been surprised at all.
Prefer a digital solution over printed paper? Sure, whatever, it’s your night vision. Do what you want with it. Stellarium is free software (web and PC/Mac, Android, iOS) that offers a detailed look at the night skies wherever you happen to be. The only drawback is that it’ll take a bit of exploring before you’re comfortable with it.
Stargazing: Stage Two
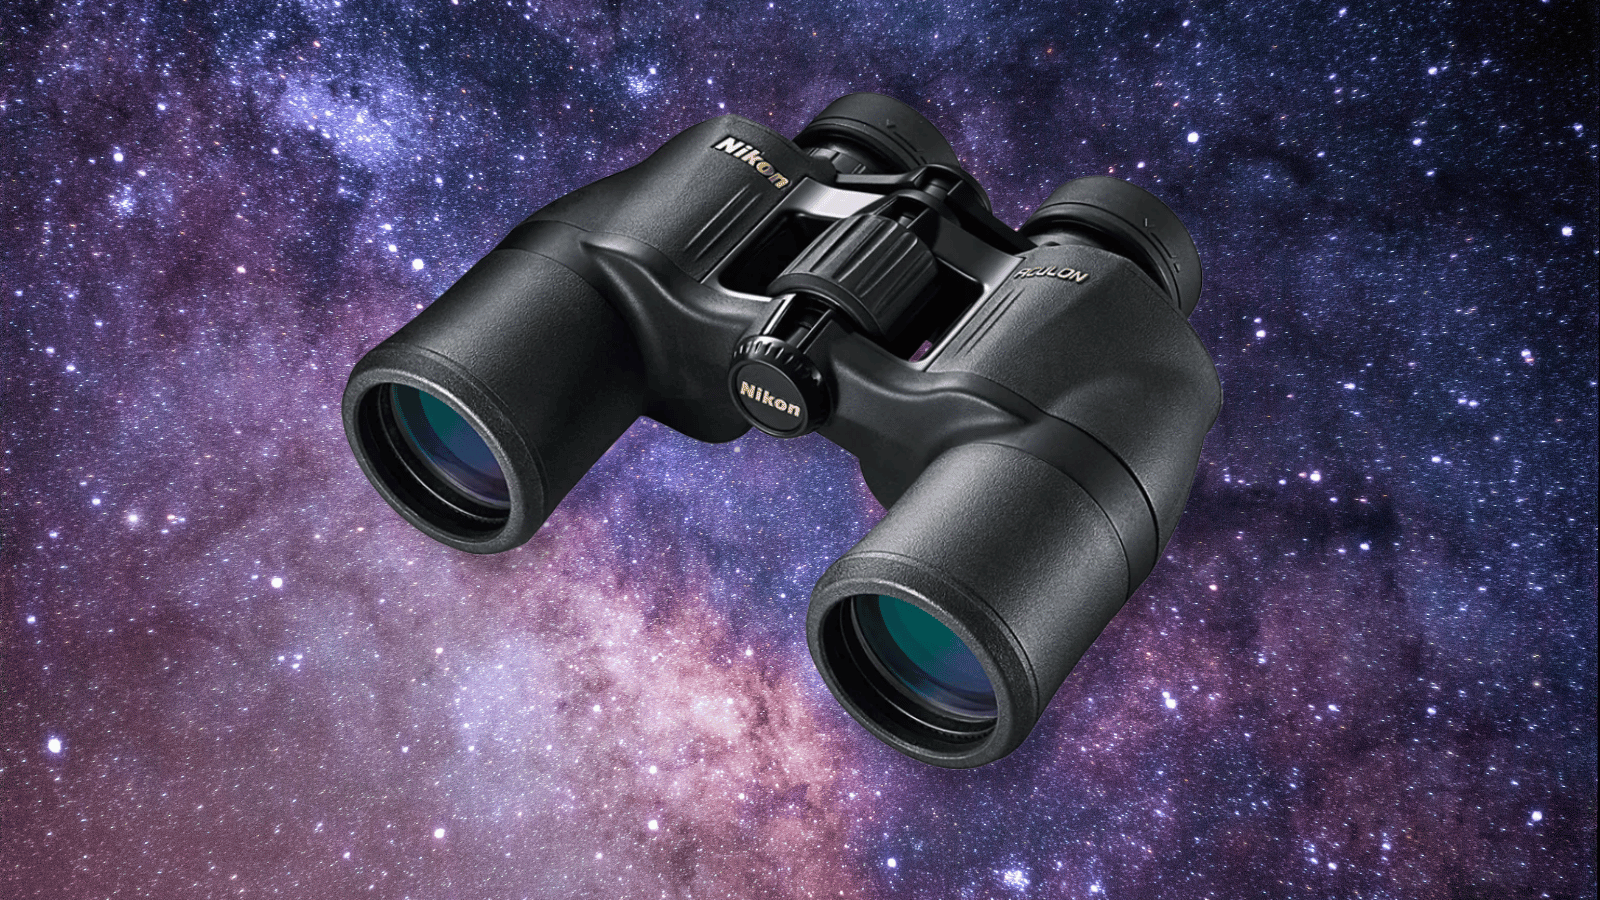
The next logical step in your stargazing journey is to throw a pair of binoculars into the mix. Many South African homes have a set of these ocular enhancers so you’ll likely find some tucked away in the garage somewhere. After all, the best pair is the pair that you have on you. But not all binoculars are created equal. A set of 10 x 25 bins work just fine on a game drive or while birdwatching but the objective (front) lenses are too small for effective nighttime work.
When it comes to binoculars, for first timers there’s a sweet spot. Price, utility, and ease of use converge on a very specific size. That would be the 7 x 50 binoculars, which combine dual 50mm objective lenses for light-gathering with a 7x zoom that won’t absolutely destroy your neck and shoulders while out stargazing. You can muck around with the Celestron Skymaster 25 x 100 once you know what you’re doing (and have the money for the fancy tripod it needs).
You can get in the door on this one for at little as R720, which is what a National Geographic pair will set you back. You could conceivably spend as little as R200 on a new pair of binoculars in South Africa but lens quality and coatings matter. When the image is blown out by starlight, looking at the Moon’s craters becomes an impossibility. If you’d like to get started on the front foot (and have R2,800 handy), the 7 x 50 Nikon Aculon A211 will serve you well for decades. In fact, you could stop here if you wanted.
Just get a 10in Dob
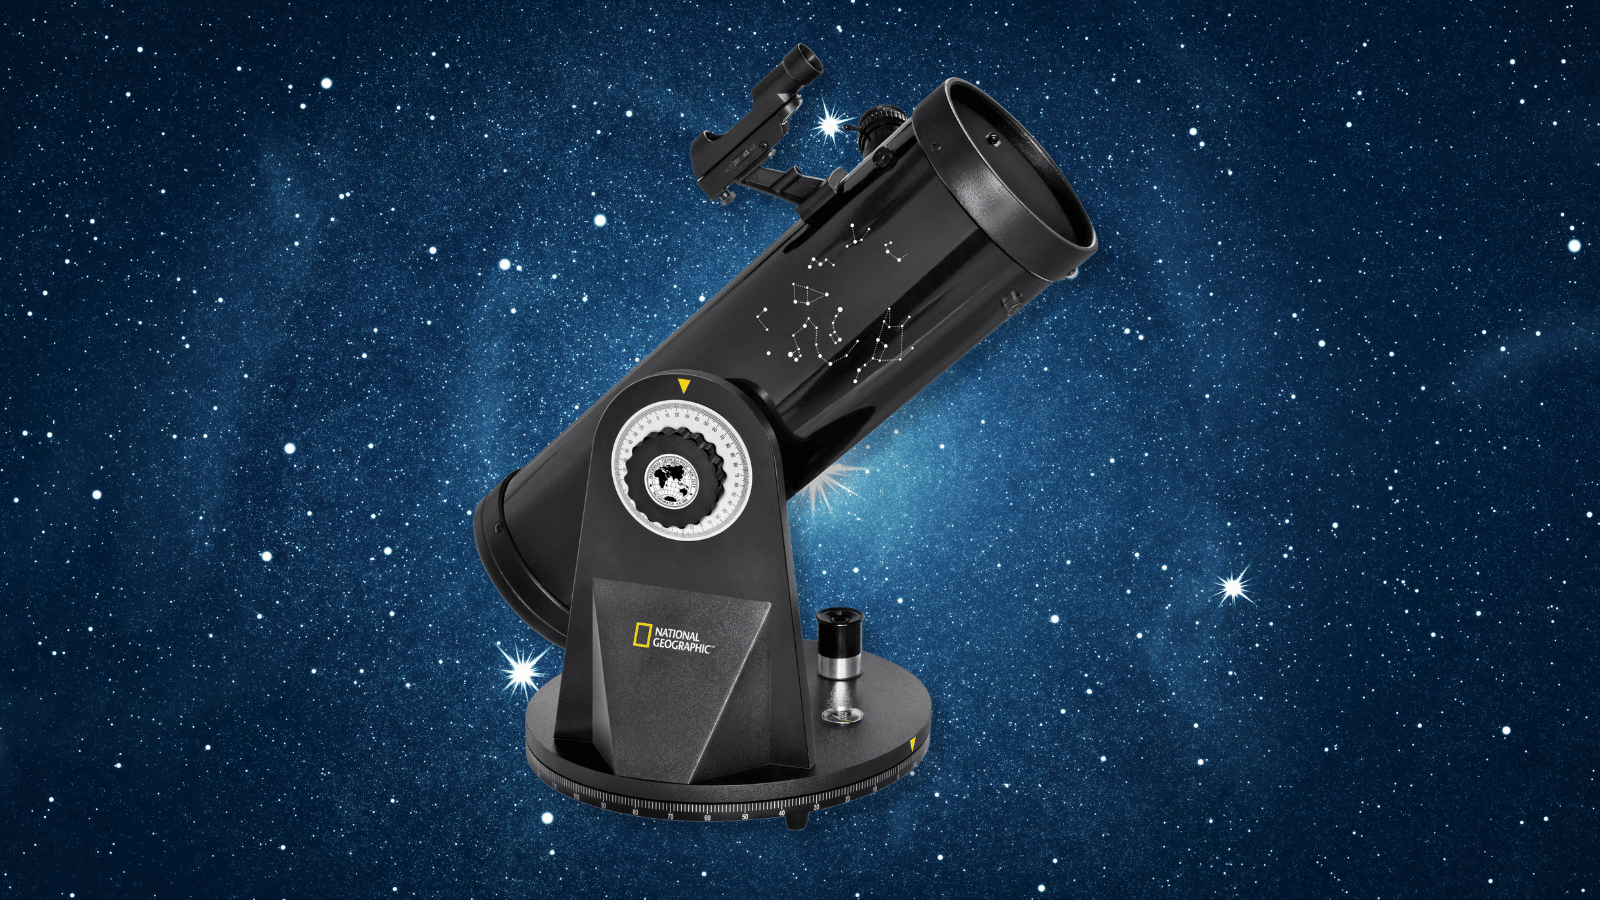
Or you could go all the way. What’s all the way for amateur stargazing? An actual telescope. There’s some great advice when it comes to buying one of these — spend the money on a 10in Dobsonian telescope. Colloquially known as a light-bucket, it’s the last telescope you’ll ever have to buy. And assuming you get into the hobby, you’ll wind up buying one eventually. But one will cost you at least R18,000. It might be a better idea to start smaller.
Buying a telescope is an involved affair but for ease of use, you’re looking either for a short-tube ‘scope with an 80mm objective lens or a reflector. The 80mm telescope offers wide-angle views with enough versatility for lunar observation but they’re weirdly hard to find in SA. The Celestron 70 Travelscope is a decent second prize, if you have the R3,200 to spare, but you’ll want to upgrade that tripod immediately.
Decent desktop reflectors can be had for as little as R2,250 — the National Geographic 90mm version uses a baby Dobsonian mount — but it’ll all eventually come back to that light-bucket. By that point, you’ll be collecting eyepieces and neodymium filters (great for Mars observations), so spending twenty grand on one of those — or a Maksutov for planetary observation — will make a whole lot more sense.


