
It’s official. Google’s Switch to Android is finally useful. The app designed to wirelessly transfer data from an iPhone to an Android now supports all Android 12 devices. No matter which Android device you make the switch to, you’ll be able to transfer your data across without a hassle.
When the Switch to Android app was first released, it only supported Google’s own Google Pixel phones. Which was… odd. Google has slowly come to realise that considerably more users will switch from an iPhone if their choices involve more than ‘Pixel’. If you’re making the leap from iPhone to Android, this app is a must-have.
No data left behind
Nobody likes transferring data for a new phone. It’s a long process, and errors happen. But the Switch to Android app works by transferring the data wirelessly. In one swoop, you’ll send your photos, videos, contacts, and calendar events over to your new phone. And the best part is – it works for WhatsApp data too. Messages, videos, and voice notes are brought over to your new phone in the same transfer. Handy.
Of course, since the data is moving wirelessly, it could take a while to complete. Especially if you’re transferring a lot of stuff. You’re probably transferring a lot of stuff. Trust us, we know about stuff. Or Stuff, rather.
How To
The process here is quite simple. Step 1 is finding the Switch to Android app on the App Store. We made that part a little easier for you. Download the app, open it up, accept the T’s and C’s, and you’re moving.
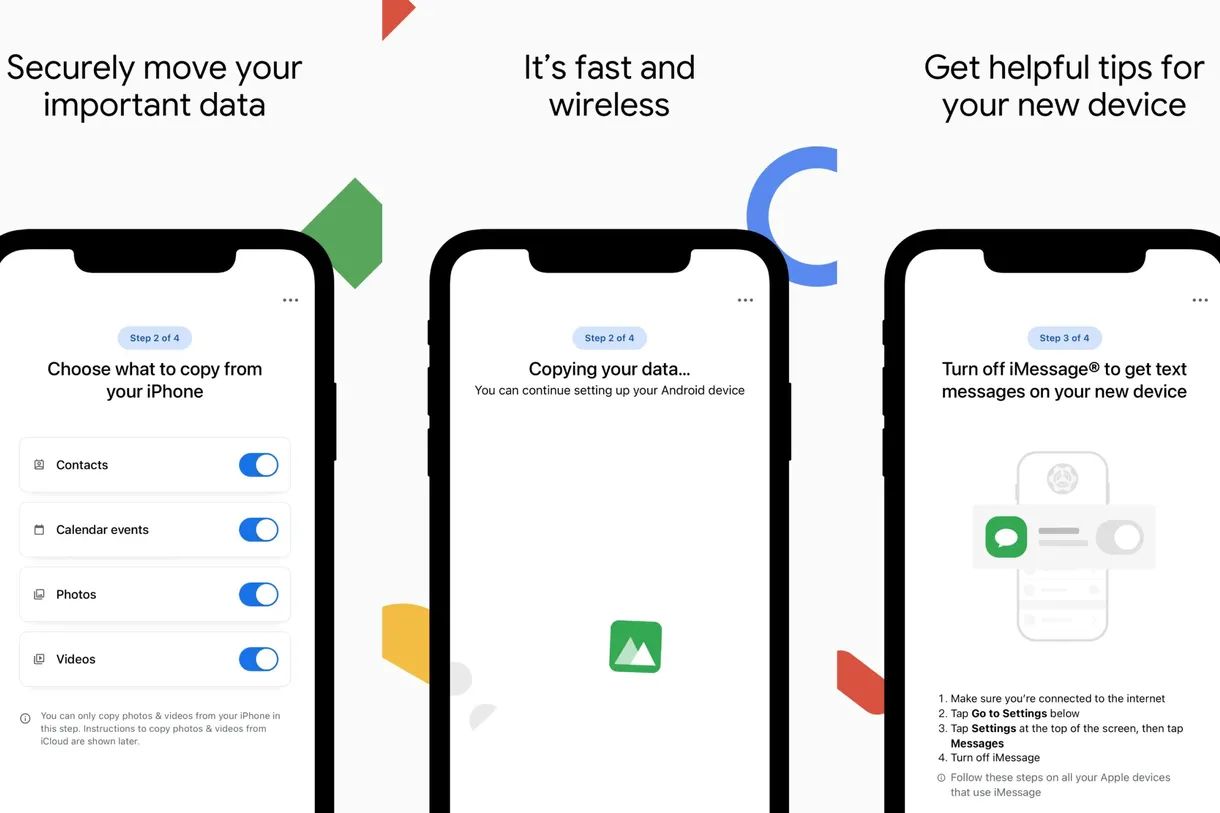
Step 2 requires you to scan a QR code. You’ll find the QR code you need in the ‘Setup and Restore’ page while setting up your new Android device. Scan the code from your iPhone, choose exactly what data you’d like transferred, and voila. The phones pair up through a temporary hotspot set up automatically on your Android. While the data is transferring, it’s best to leave both phones well alone, for fear of causing any errors. Just wait patiently, and eventually, it will finish its work.
Read More: Here’s how to transfer your WhatsApp data from Android to iOS
Step 3 is remembering to turn off iMessage on your iPhone. Don’t worry though, the Switch to Android app reminds you via a prompt on-screen. You need to do this so that texts sent to you actually reach your Android Messages app, and aren’t lost in the iMessage realm.
Step 4 is the final one. This is the iCloud transference stage. You can request a transfer at your discretion. Should you accept, it will open Safari automatically to the iCloud page. From there, you’ll be able to request the transfer of data over to Google Drive and Google Photos. This may be a bit tedious. Many will probably just skip this section entirely. Still, it’s nice to have the option.
And that’s it. Hopefully, this method spared you the transfer stress this time around. If you’re ever looking to head in the other direction, that’s also a thing you can do rather simply.


