
Ah, passwords. Humanity’s way of keeping prying eyes away from… well, everything. We despise them, and yet, can’t live without them. Google boldly asks: what if we could? That’s the future Google is selling with the help of passkeys, an authentication solution that makes use of a device’s local PIN or biometrics to replace finicky (and usually hackable) text-based nightmares.
Last week, Google announced the launch of passkeys across all of Google’s personal accounts, though it won’t force the change on anyone that doesn’t want them. In fact, if you weren’t an avid tech-news reader, you probably weren’t aware of their existence due to Google’s odd marketing of the feature. Fortunately, setting up your own passkey is relatively simple.
Tick some boxes
First, you need to make sure your hardware and/or software is capable of supporting the new feature. You’ll need any sort of desktop or laptop with either Windows 10 (or higher) or MacOS Ventura (or later), plus either Chrome 109, Safari 16, or Edge 109 browsers.
If you’d rather use your smartphone, that’s an option too. Android users will need, at the very least, Android 9. For those on iPhone, you’ll require iOS 16 or better. Make sure that your device’s Bluetooth is turned on, and that some form of screen lock is in place before you begin.
Lastly, you’ll need a personal Google account to even think about setting passkeys up. Anyone hoping to use a Workspace account through their school or business won’t have the option. There’s a slight chance this could change in a future update, though we’re basing that on hopes and dreams, rather than any official information from Google.
Set up your first passkey
With the prep work done, we can discuss how to set passkeys up.
- Head over to this link to get going – g.co/passkeys – where you’ll be asked to sign in to your Google account.
- Those that already have an Android device signed into that account, may already have passkeys that were automatically created for them. Click Use passkeys (you can’t miss it) after which a pop-up will appear confirming your use of passkeys. Click ‘Done’.
- Should you be a part of the iOS family, you probably won’t see any of your current devices listed. You should click that Create a passkey button at the bottom of your screen.
- Note: setting up a passkey for another device other than your PC is far easier to set up on that device. It’s doable from your PC for another device, though the process is far more complicated.
- Clicking the Create a passkey button will prompt a pop-up that’ll let you create a new key for your current device or for another device. Click continue to, well, continue the process for your current device. Signing up for another device will show a QR code that needs to be scanned by that other device.
- iPhones may be asked to turn on Cloud Keychain if this isn’t already turned on by default (this is required for passkeys to work at all on iPhone devices).
- Follow any steps that require the entry of any personal information and…
- You’re done!
Read More: What are passkeys? A cybersecurity researcher explains how you can use your phone to make passwords a thing of the past
Removing passkeys
Should you ever lose a device with your intellectual fingerprint property on it, don’t panic. Google gives you the ability to delete passkeys that you created at the click of a button. Removing automatically created passkeys requires a little more effort, but it’s doable.
Removing a passkey you created
- Go to your Google account, and sign in.
- Select Security (Found in the left-hand column). Click on How you sign in to Google.
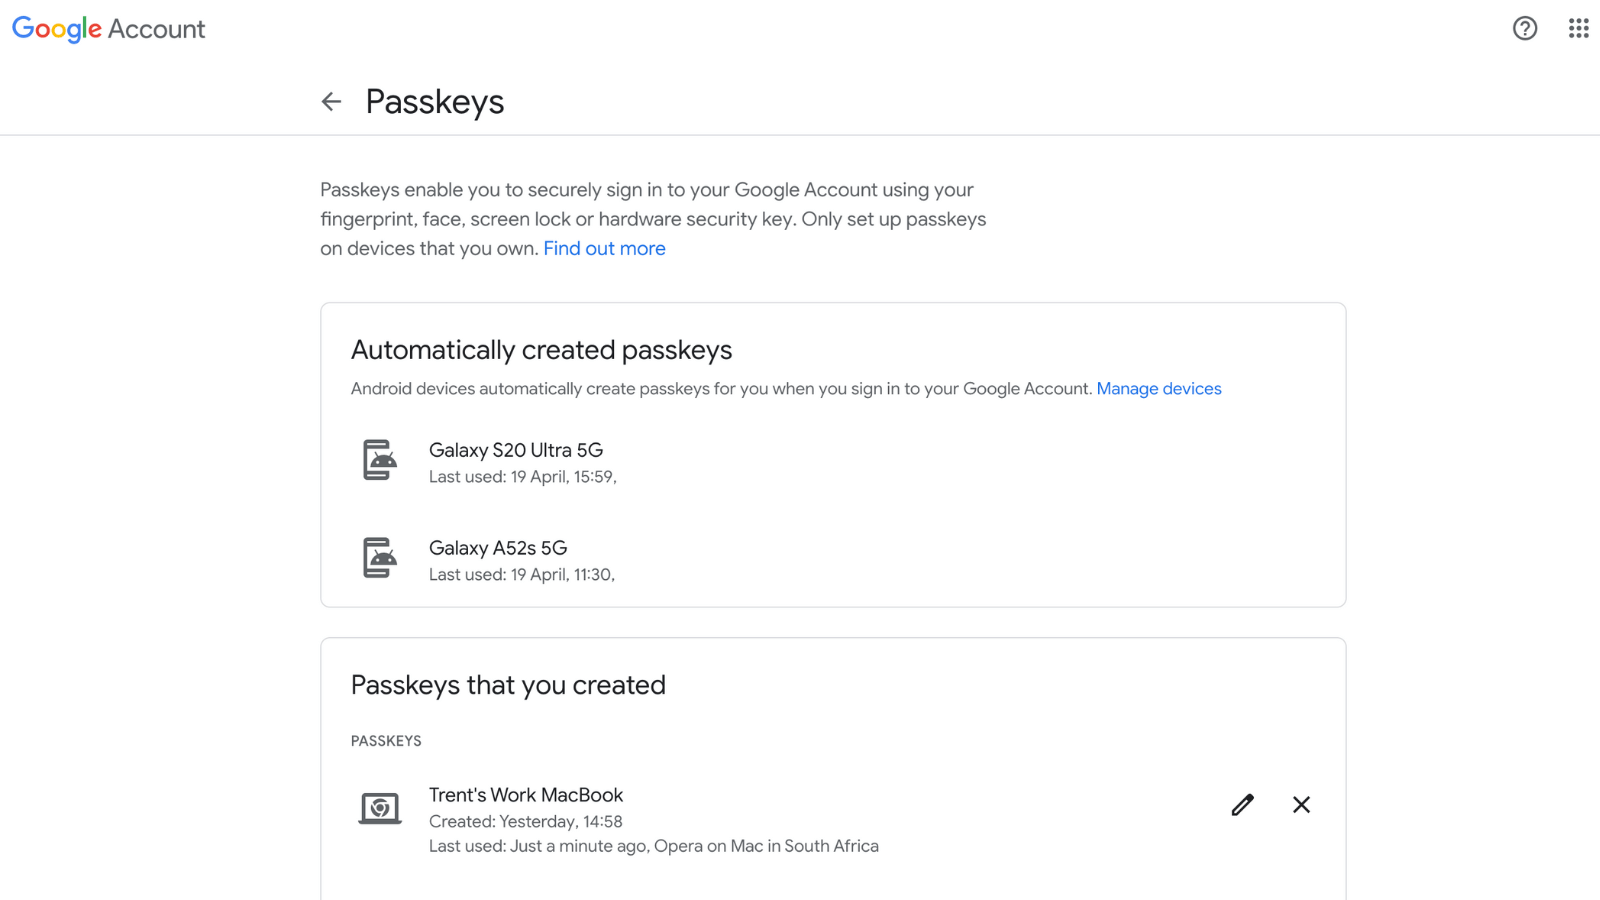
- Click on Passkeys.
- You’ll be greeted with a list of all your passkeys, separated by automatically created passkeys and passkeys you created. Hover over a passkey you created and click the ‘X’ that appears to the right of the device name.
Removing automatically created passkeys
Unfortunately, you can’t remove automatically created passkeys at the click of a button. You’ll need to sign out of the device altogether to be rid of the device’s passkey. To do so:
- Go to your Google account, and sign in.
- Select Security (Found in the left-hand column). Scroll down, and select Manage all devices.
- Choose the device you want to remove passkeys from and click Sign out.
Note: Should you attempt to sign back into a device that you removed from your Google account, there’s a good chance that a new key will automatically be created in the device. We’re hopeful that Google can make a fix for this, though we’d advise against getting your hopes up.
Turning off passkeys entirely
If passkeys aren’t your thing, there is a way to revert to the stone age and resume using passwords and 2FA (two-factor authentication). It’s worth mentioning that this won’t delete any passkeys tied to your account. It just won’t use them as a form of authentication. Should you ever turn the feature back on, any that were previously created will still be present and available.
- Go to your Google account, and sign in.
- Select Security (Found in the left-hand column). Scroll down to Skip password when possible and turn it off.
And… that’s it.


