
Newtonian telescopes have their issues but Celestron's StarSense Explorer DX130 packages enough to make this a very easy-to-use beginner's Newt. It's not for budding astrophotographers and it could do with a couple of upgrades but you're getting an excellent tube and fantastic app integration for your money.
That said, we're still going to recommend you immediately upgrade the stock eyepieces.
-
Setup
-
Ease of use
-
Optics
-
Accessories
-
Value
The folks who make up Stuff are all nerds in one way or another. Some enjoy movies, some are keen on audio, and others are into gaming or Lego or astronomy. But everyone’s keen on something to the point of obsession. Only… Stuff doesn’t get many telescopes through its doors so it’s hard to indulge that astronomy obsession properly. This might be why we jumped at the Celestron Starsense Explorer DX130 AZ for review.
The StarSense Explorer DX130 AZ is a 130mm (5-inch) Newtonian reflector that uses the StarSense Explorer and an included alt-az (altazimuth) mount for simple night sky navigation. This scope setup is for beginners looking to perform visual observations without learning manual navigation or the intricacies of a more sophisticated mount system. Since it’s for complete newbies, we thought we’d start with a brief glossary of terms.
Telescope glossary
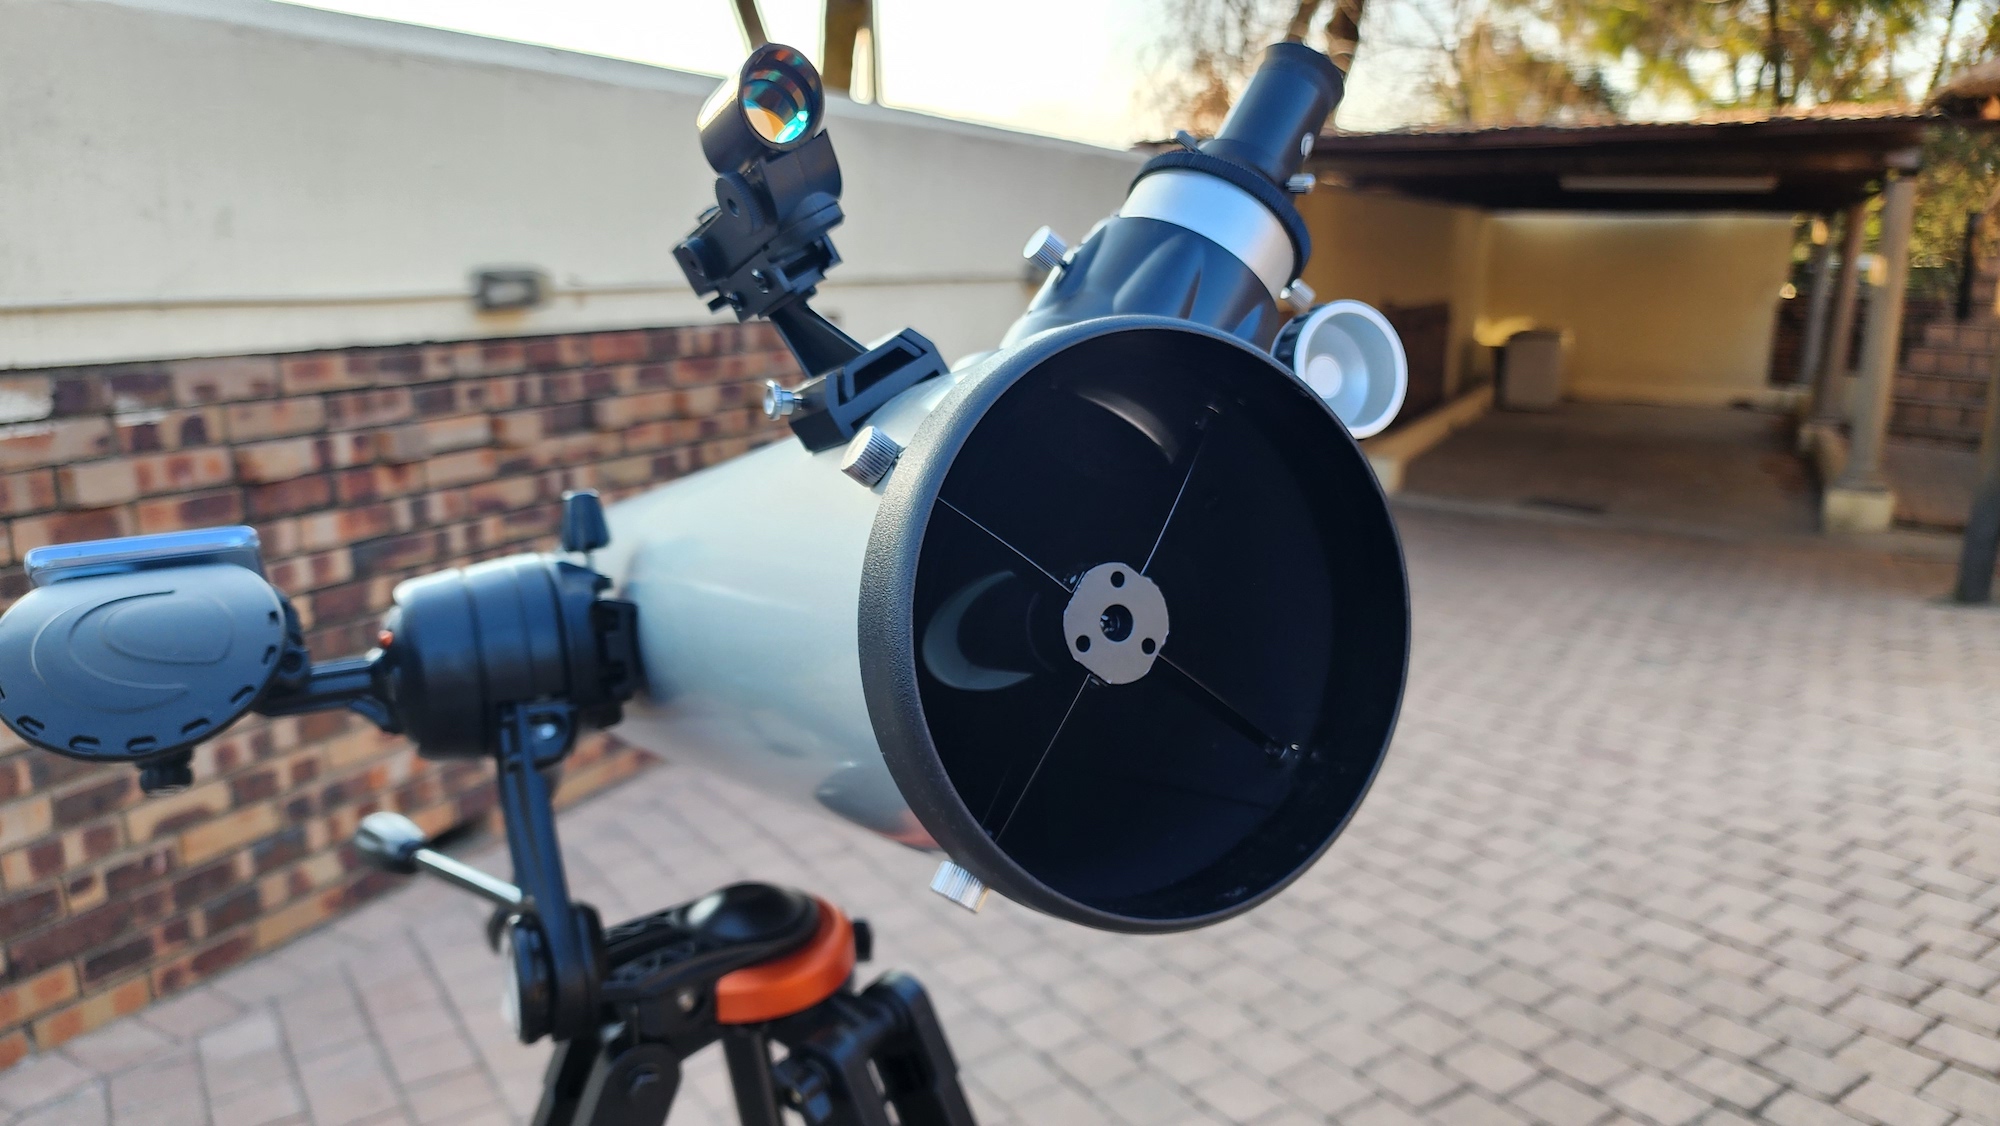
Newtonian reflector – A telescope design consisting of an open tube with a large primary mirror at its base and a smaller secondary towards the top of the tube.
OTA – Optical tube assembly. Basically, any telescope tube.
Spider – The cross-shaped arrangement that holds a Newtonian reflector’s secondary mirror.
Drawtube – The part of the focuser that moves up and down. Eyepieces are inserted into this space to change magnification.
Mount – The apparatus that connects a telescope tube to the tripod below it. An altazimuth mount is an unpowered mount capable of moving vertically and horizontally.
Box full of stars
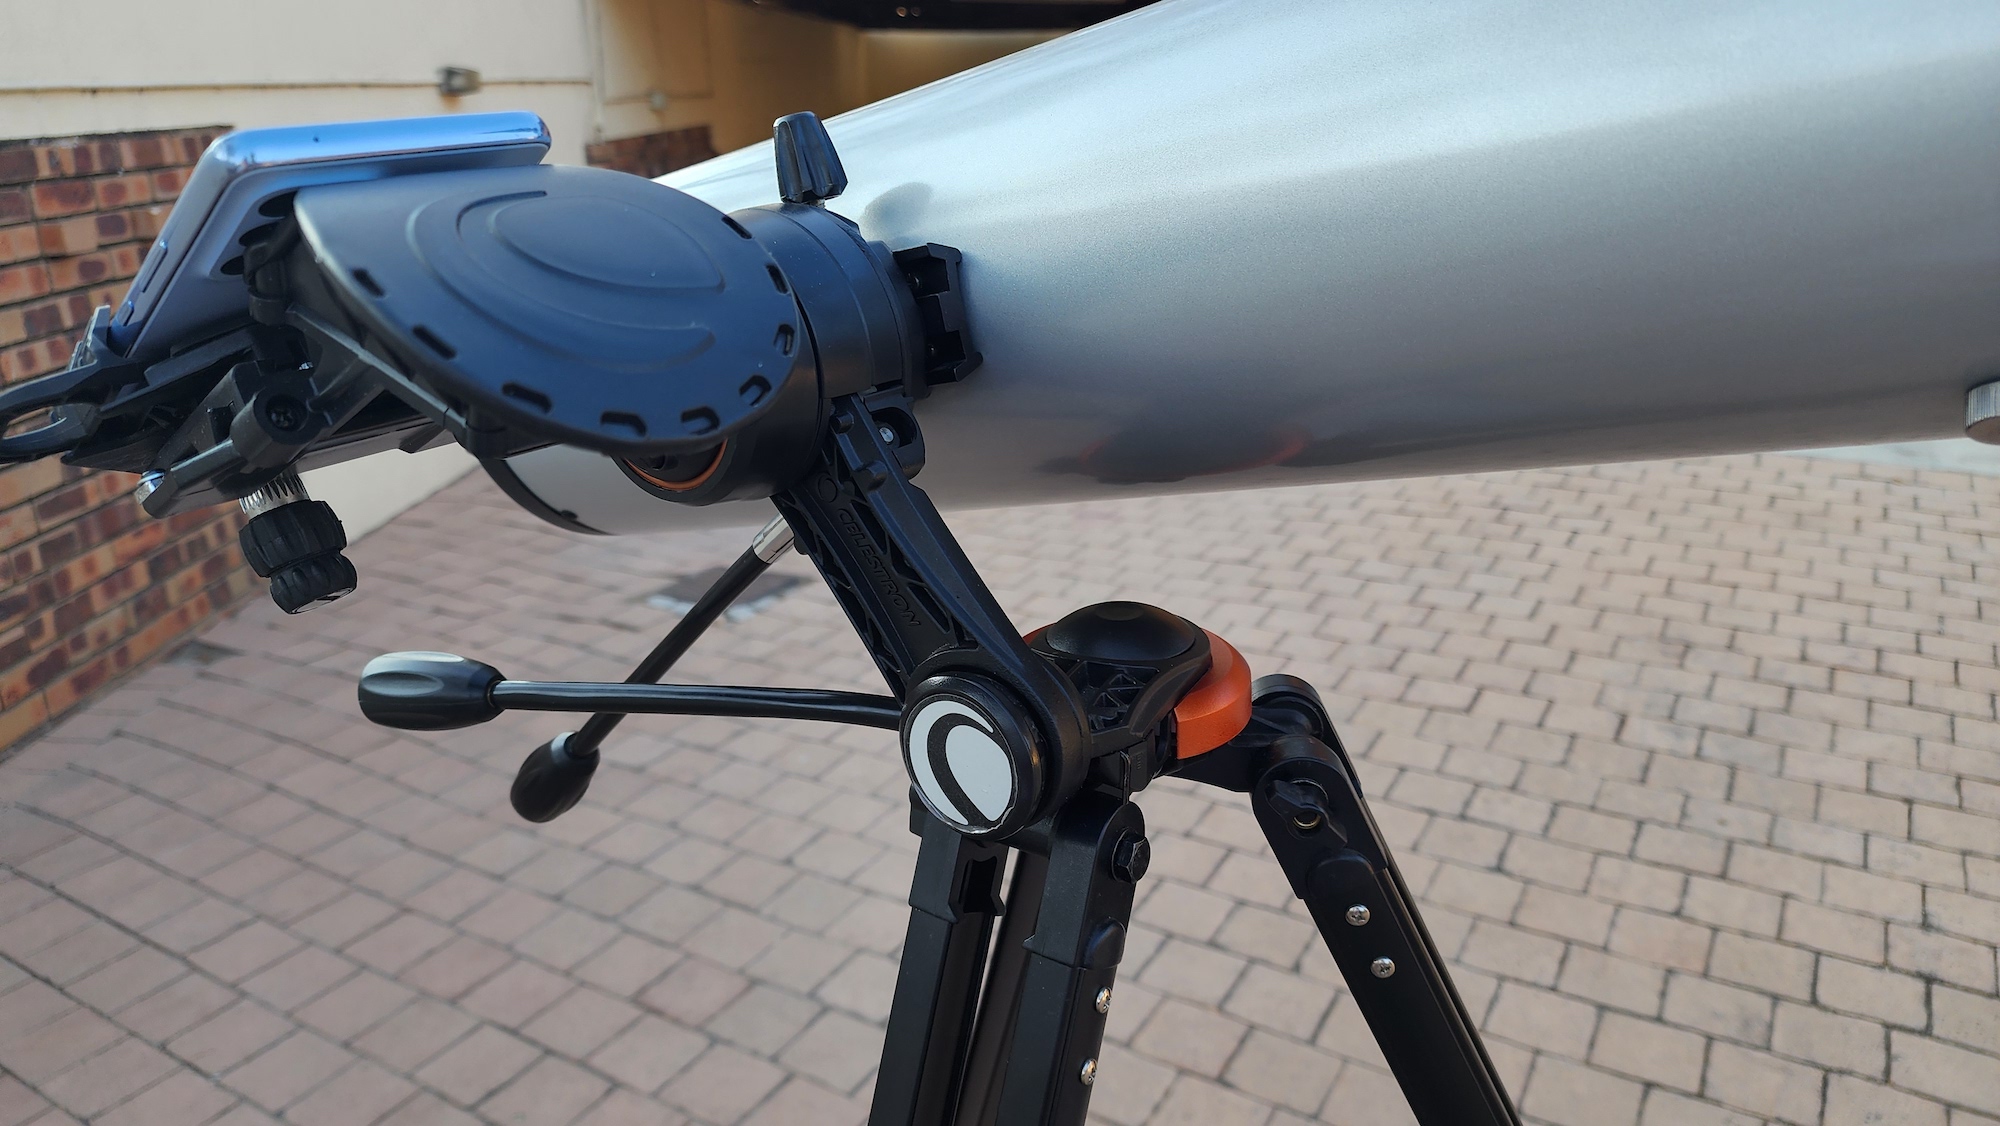
In the large box — it travelled on the back seat and not in our boot — users will find a complete set of astronomical observing equipment. The black tripod and mount are connected in a single unit on arrival and all that’s required is to connect the slow-motion controls (the black cable in the image above) to the mount using the included hex key that slots into the mount. The triangular tray should also be attached, via three wingnuts, for increased tripod stability. And to give you a place to stick your eyepieces while observing, naturally.
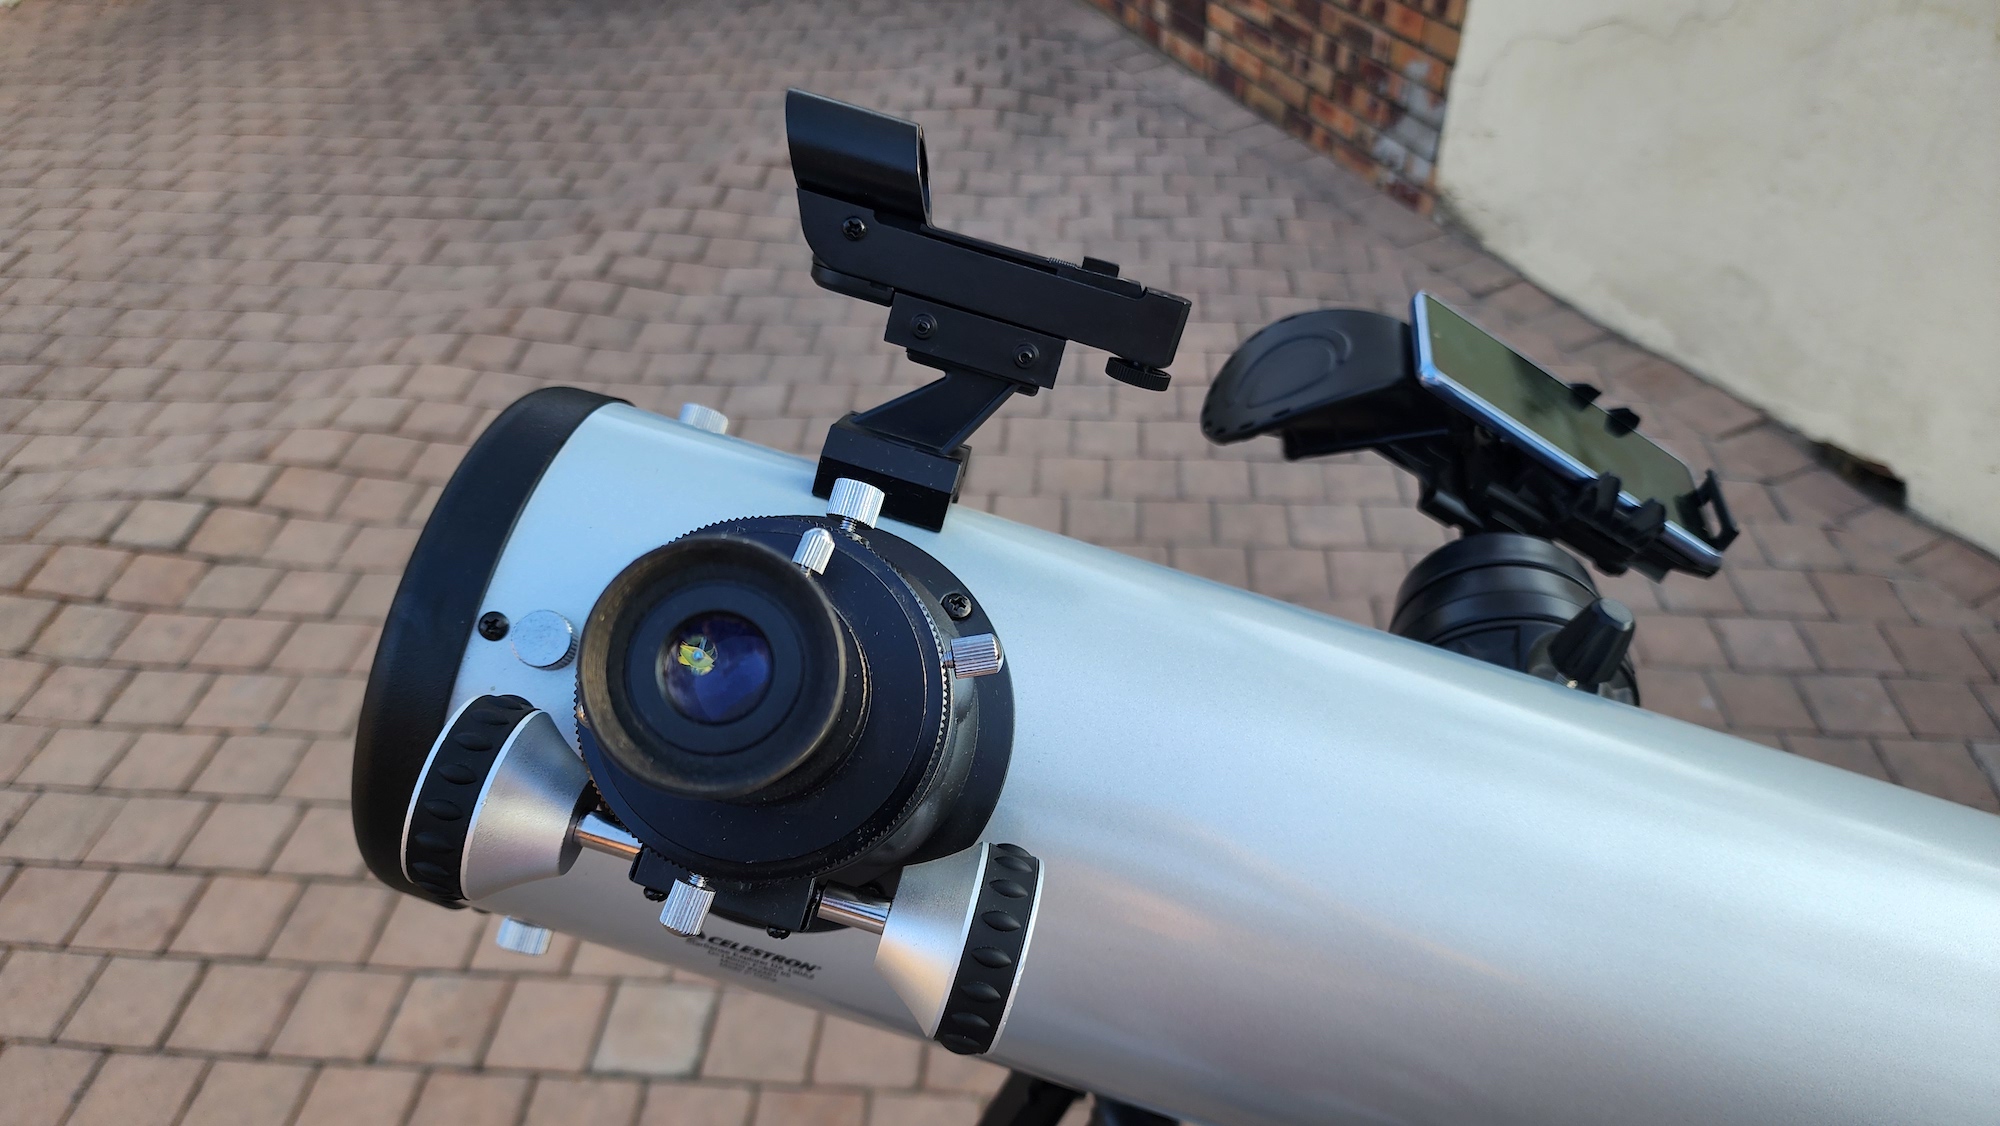
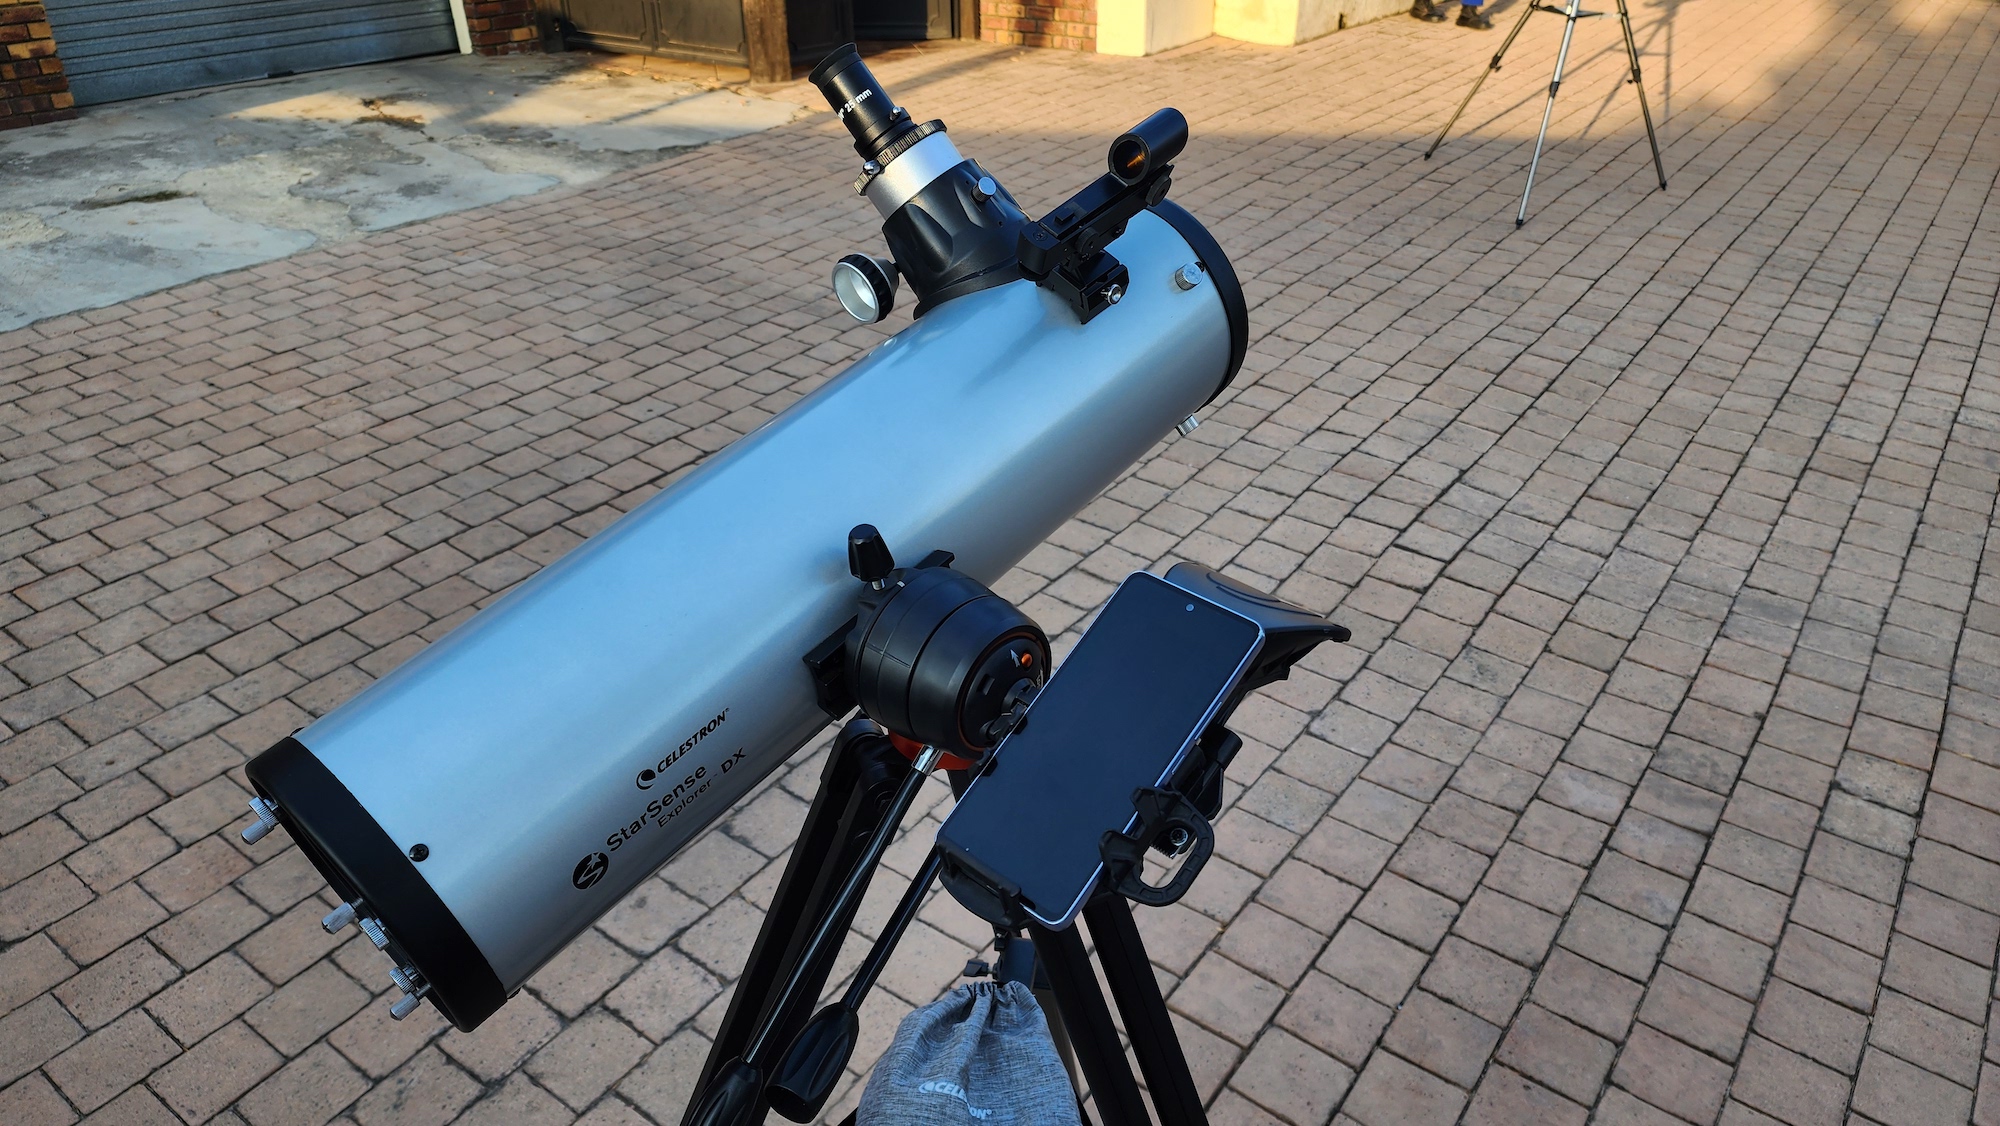
There’s a rather strange apparatus for mounting your smartphone to the tripod, which we’ll detail in a bit, and then the optical tube assembly (OTA). The grey liveried tube, almost certainly made by Suzhou Synta in China, is well-constructed and sturdy for a mass-produced ‘scope. It has a dovetail rail, a short v-shaped strip, that slots into the mount. A screw then holds the OTA in place. There’s also space for the red-dot sight for manually sighting the scope. On the outward-facing side of the tube is a focuser with a metal drawtube and a plastic housing. Included are adaptors that allow for 1.25-inch and 2-inch eyepieces. Celestron’s tube is an F5 (objective/length, in this case, 130mm/650mm), meaning it excels at wide-field observation. Newtonian reflectors are also not bothered by false colour (chromatic aberration) as a consequence of their design, meaning that your lunar and planetary views should also be crisp. Up to a point, but that’s a learning curve thing.
Then there are the ‘extras’, such as they are. A pair of basic eyepieces, 25mm and 10mm Celestron Kellners, are included in the box. We’ll go into more detail about eyepiece options a little later. There’s a small cleaning cloth and the instructions, which include a small card with the registration code you’ll need to use the Celestron StarSense Explorer app for navigation with the telescope.
In the end, setup took us about ten minutes to go from box to fully assembled telescope, but there were a few other steps before we could start observing.
The StarSense align
Two alignments should be performed in daylight if you want to stand a chance of finding your target at night. The red-dot sight is the old-school method but it’s handy for manual navigation. If you know how to use it, snagging open clusters and Messier objects becomes as simple as squinting through at the little laser pointer. The smartphone app works the same way, except you only need to squint at your phone and tap your desired target.
Both alignments work in more or less the same way. Users pick a target in the distance — 500-metres away is recommended — and centre it in the eyepiece in the focuser. Since this is done during daylight, the target and the sun should not be in the same general area. Then the red-dot sight is adjusted via two little knobs to sit over the chosen distant object. If you tweak these again, you’ll need to realign.
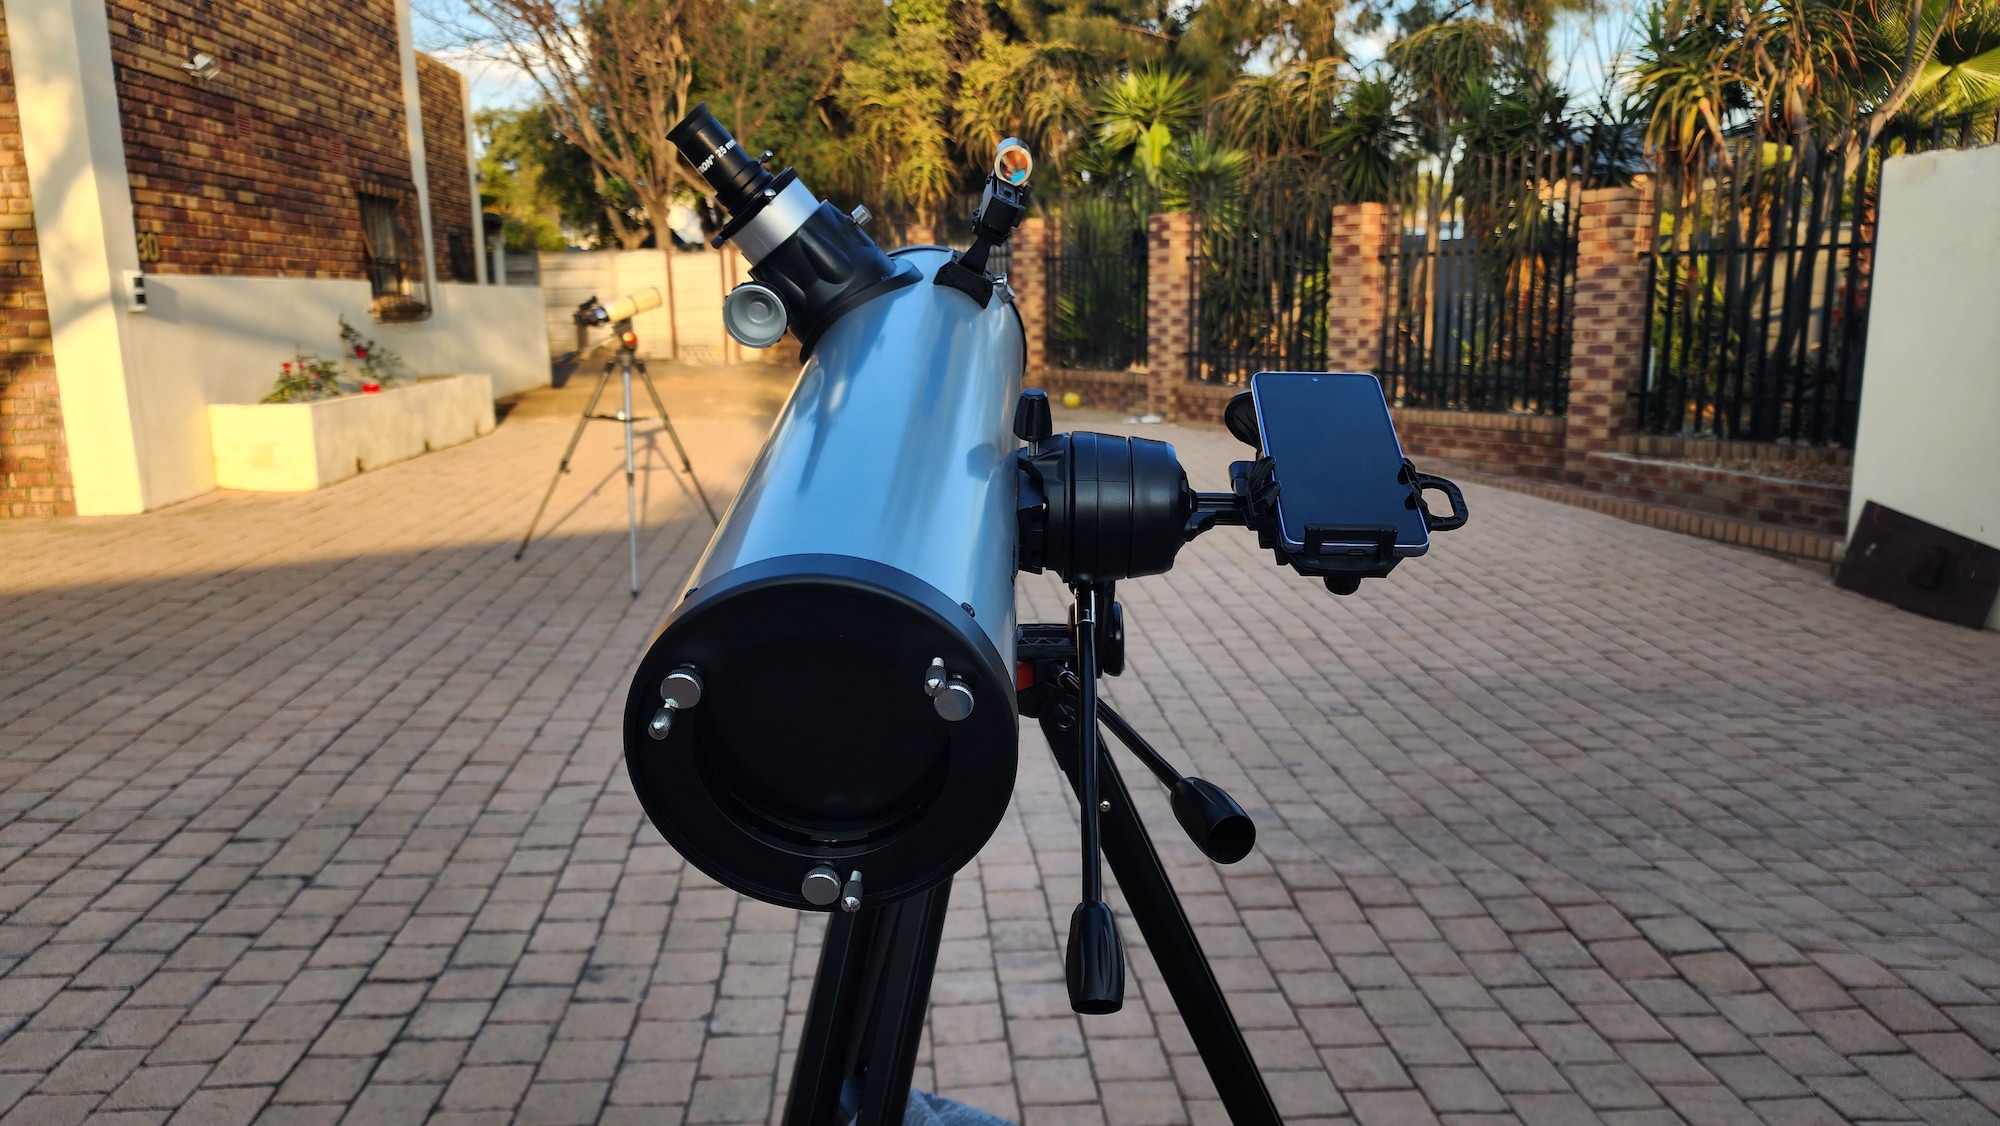
To use smartphone navigation, the StarSense Explorer app (Android, iOS) should be installed and the phone mounted on the side of the telescope. The smartphone mount consists of an adjustable bed for the phone and a mirror that faces outward. A phone’s camera is used to see the mirror reflection, with a very slick rear screw system allowing for exact camera placement. Once the camera is in place, the process is the same. Find target, select target placement on the screen, and you’re done. It’s worth noting that a Newtonian reflector will always show images upside down — it may take a little while to get used to seeing that, especially during alignment.
If it works in Jozi…
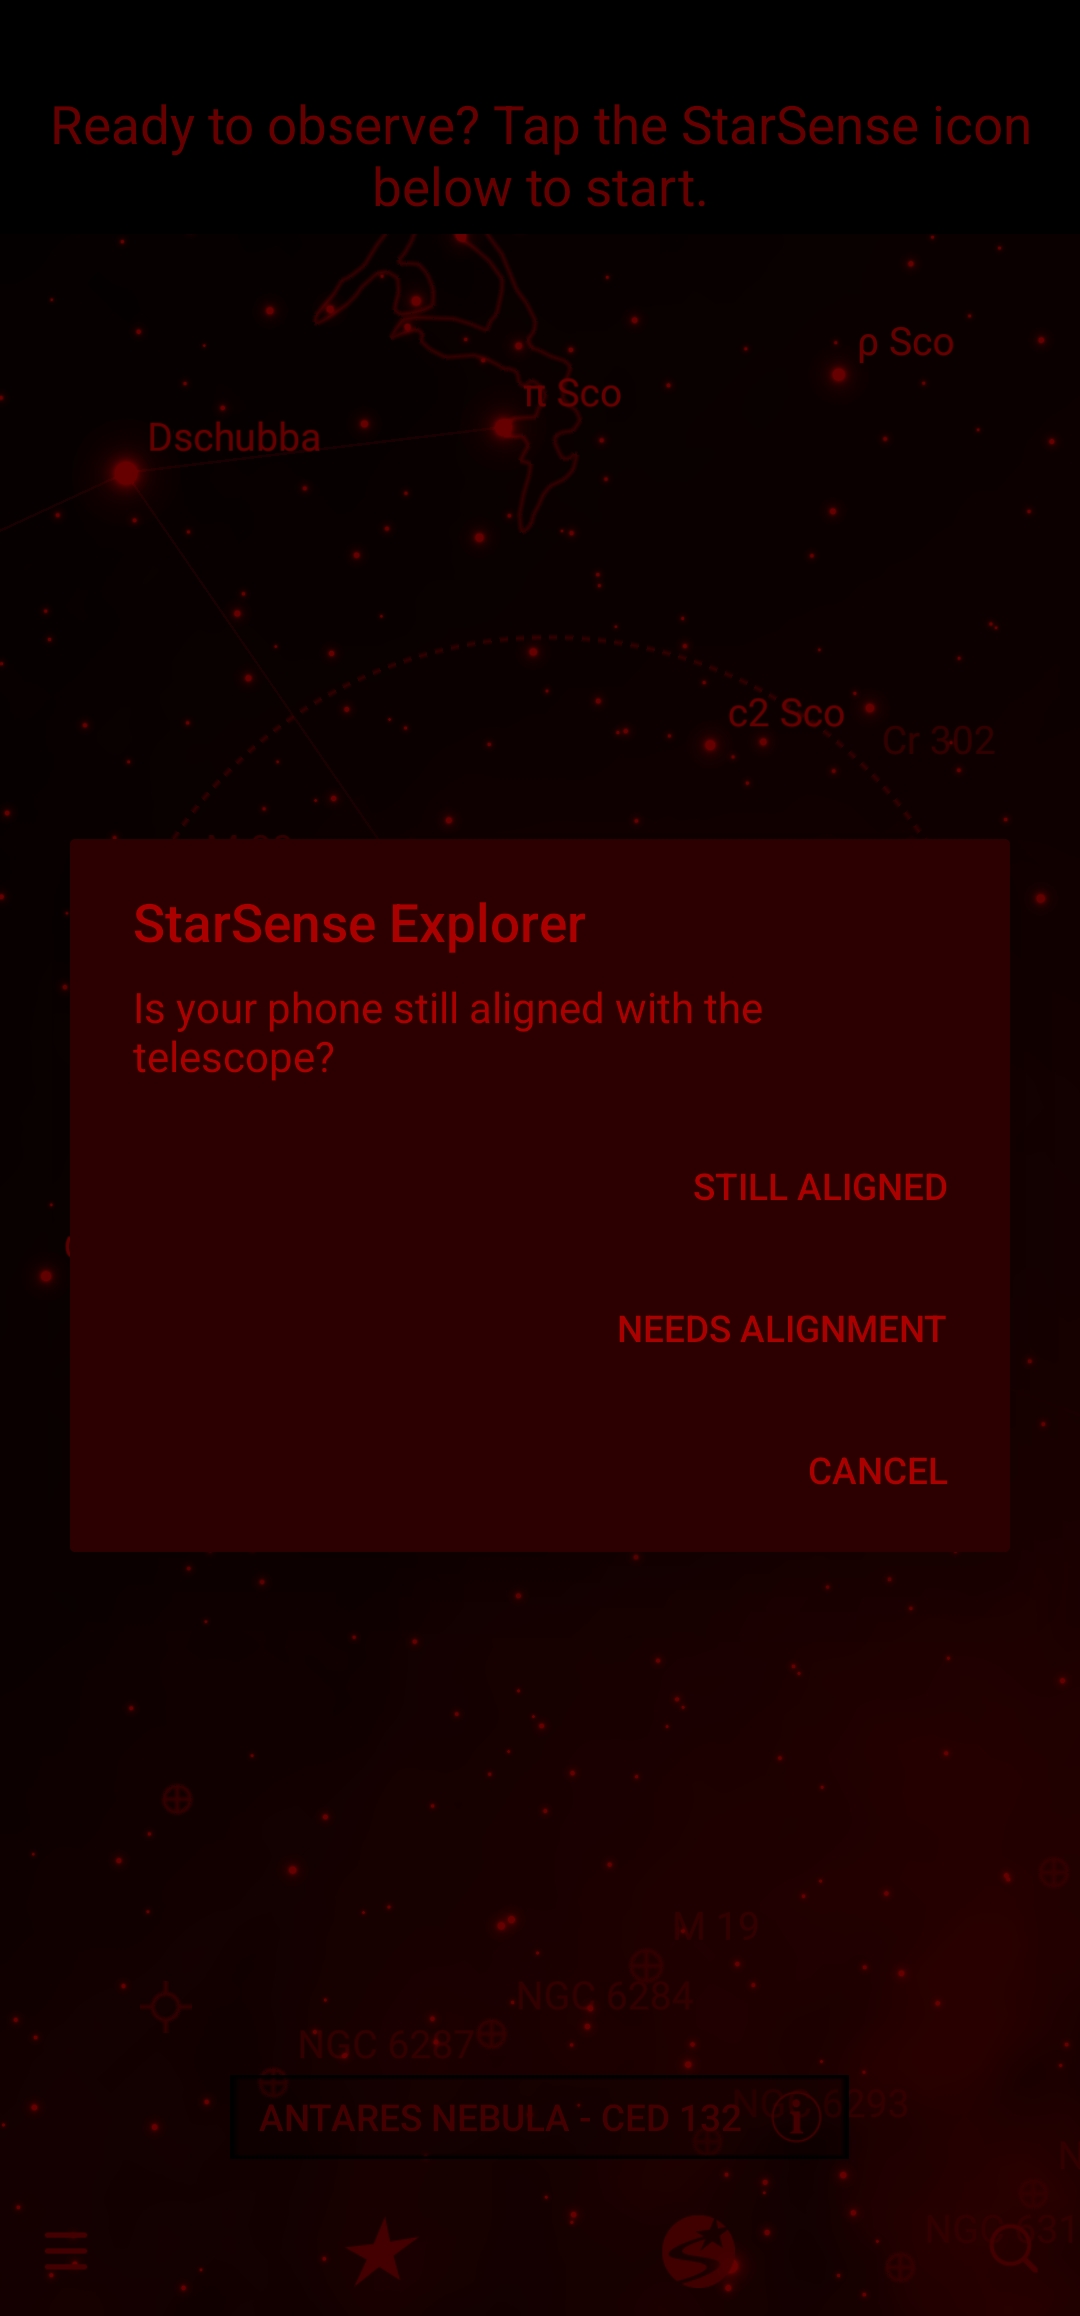

Celestron’s app is, if anything, even easier to use than the company’s StarSense and NexStar motorised mounts. Celestron famously has the most user-friendly system on the market, so that’s saying something. Without registration, the StarSense Explorer app is little more than a pocket planetarium. Once you’ve registered (remember, the code is in the package), it’ll ask for your telescope type and permission to use your location. With this and camera access, it turns an undriven mount into a computerised push-to system that is stunningly easy to navigate.
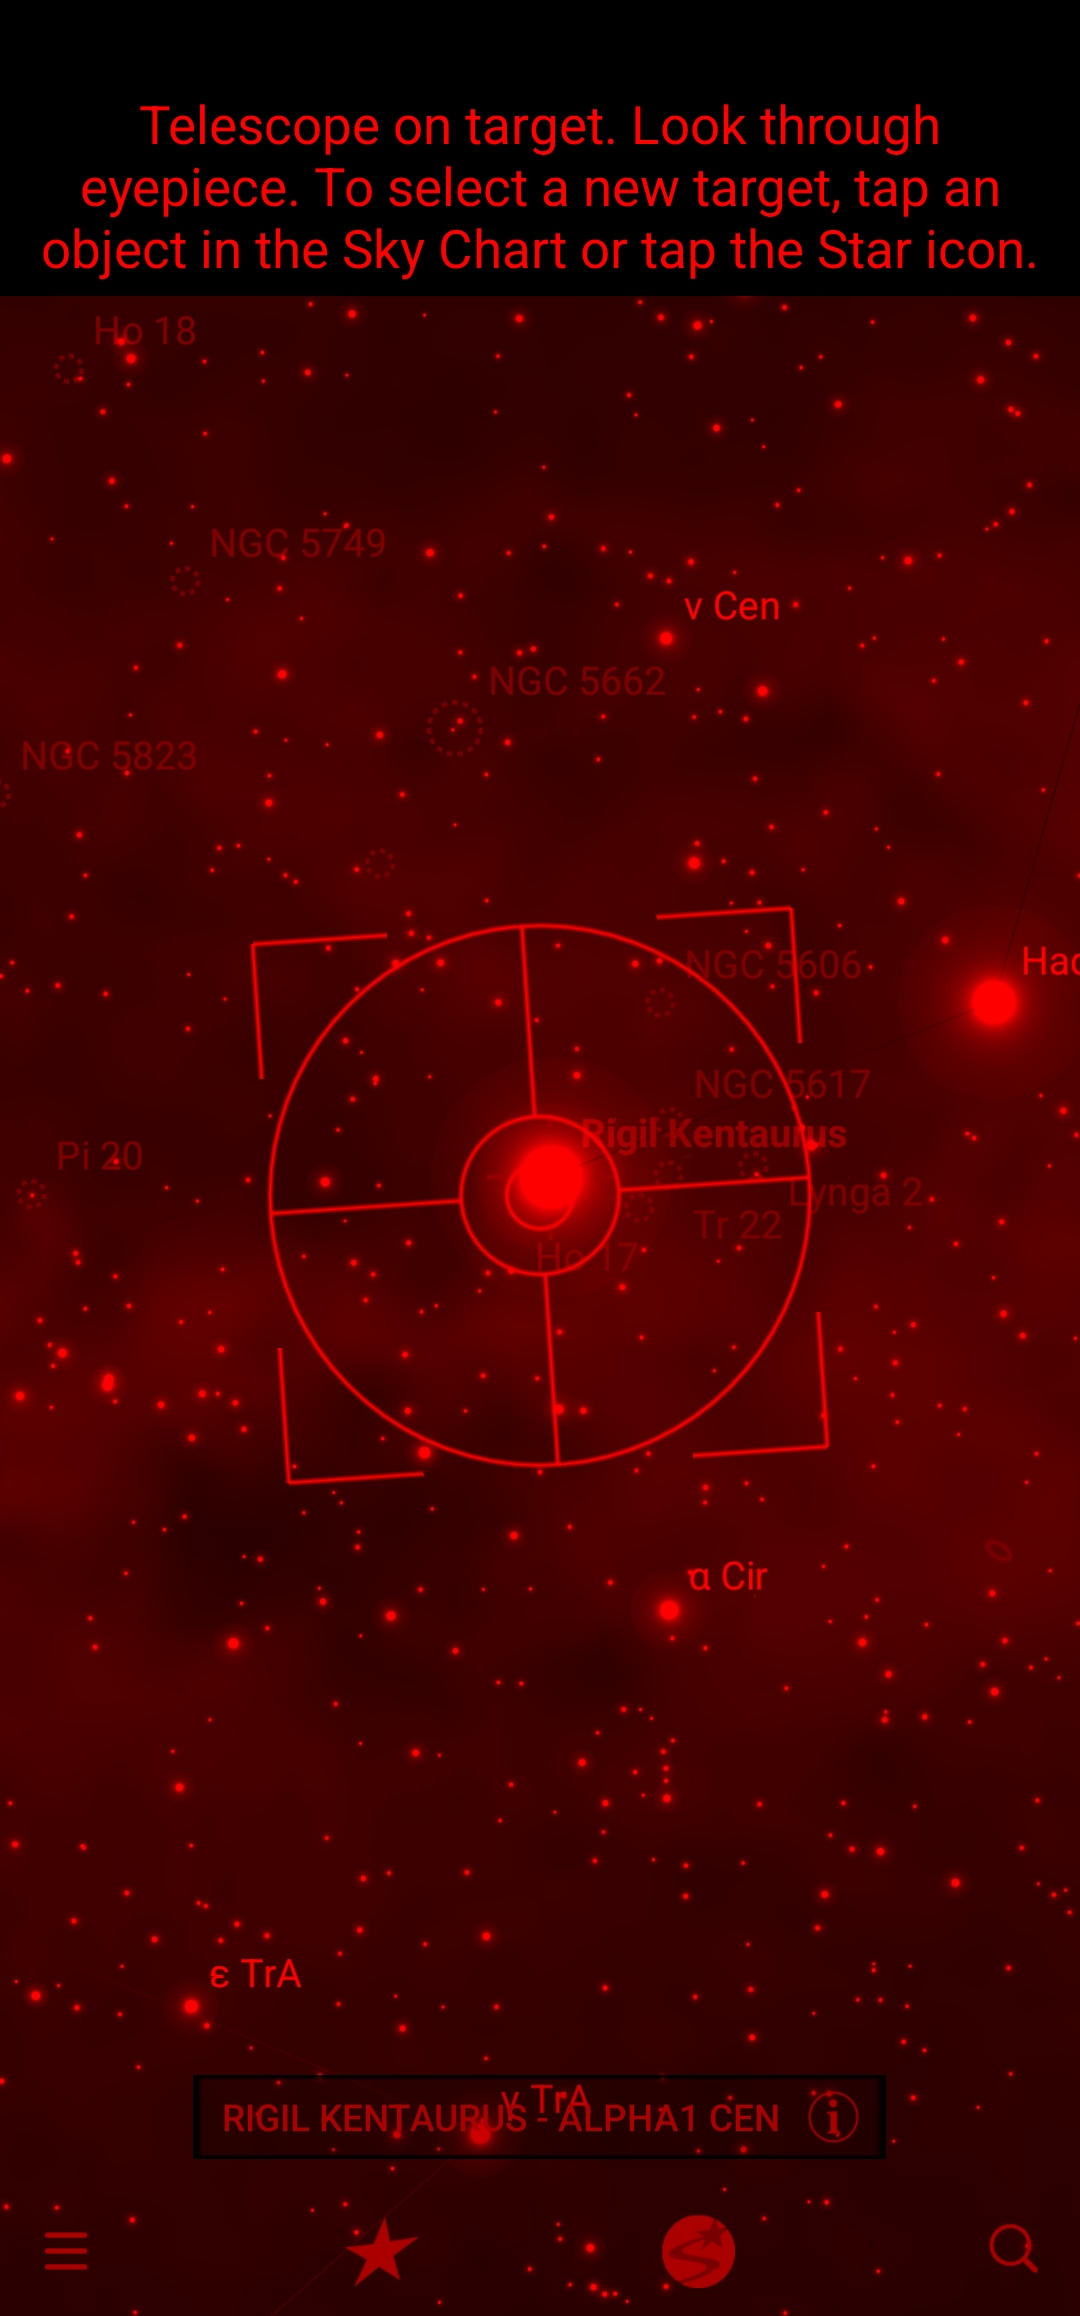
All that’s required is to tap the StarSense icon (the circular one in the images above) and navigation pops up. It uses a combination of GPS location and the stars visible in the mirror (remember to take the cover off before starting) to navigate users to where they want to go. If, like us, you’re using it under the Johannesburg light dome, you might not always see your target but it’ll be there. Don’t go expecting to see Pluto or Uranus, or even most of the fainter Messier objects unless you’re camping somewhere with less ambient light, but you’ll still spot plenty even in the middle of a large city.
Movement around the sky map uses the same gestures you’d use to zoom around images. A double tap on a target will lock it in and then an onscreen indicator will show you where to push the scope. Once you’re on target, it’s just a question of peering through the eyepiece. You will, occasionally, have to adjust the slow-motion controls to keep your target in view.
The optics of it all
There are several versions of Celestron’s 130mm Newtonian reflector, all of which share the same tube. That means you can have this exact telescope for as little as R6,000 (but then you’re contending with a very complicated undriven mount, even if the tripod is better) or as much as R18,700 (for a fully-computerised SLT mount with a steel-legged tripod). Here, you’re paying for the alt-az mount, the smartphone mount, app access, and the OTA.
The setup has its benefits and drawbacks. The optical mirrors are clear and well polished but the telescope’s design means that you will have to venture into collimation. Basically, you’ll adjust the rear screws to position the mirror for perfect performance. It’s a good idea to do this during the initial setup (here’s the Celestron walkthrough). It’s a pain in the ass but it’ll pay for itself in excellent images through the scope.
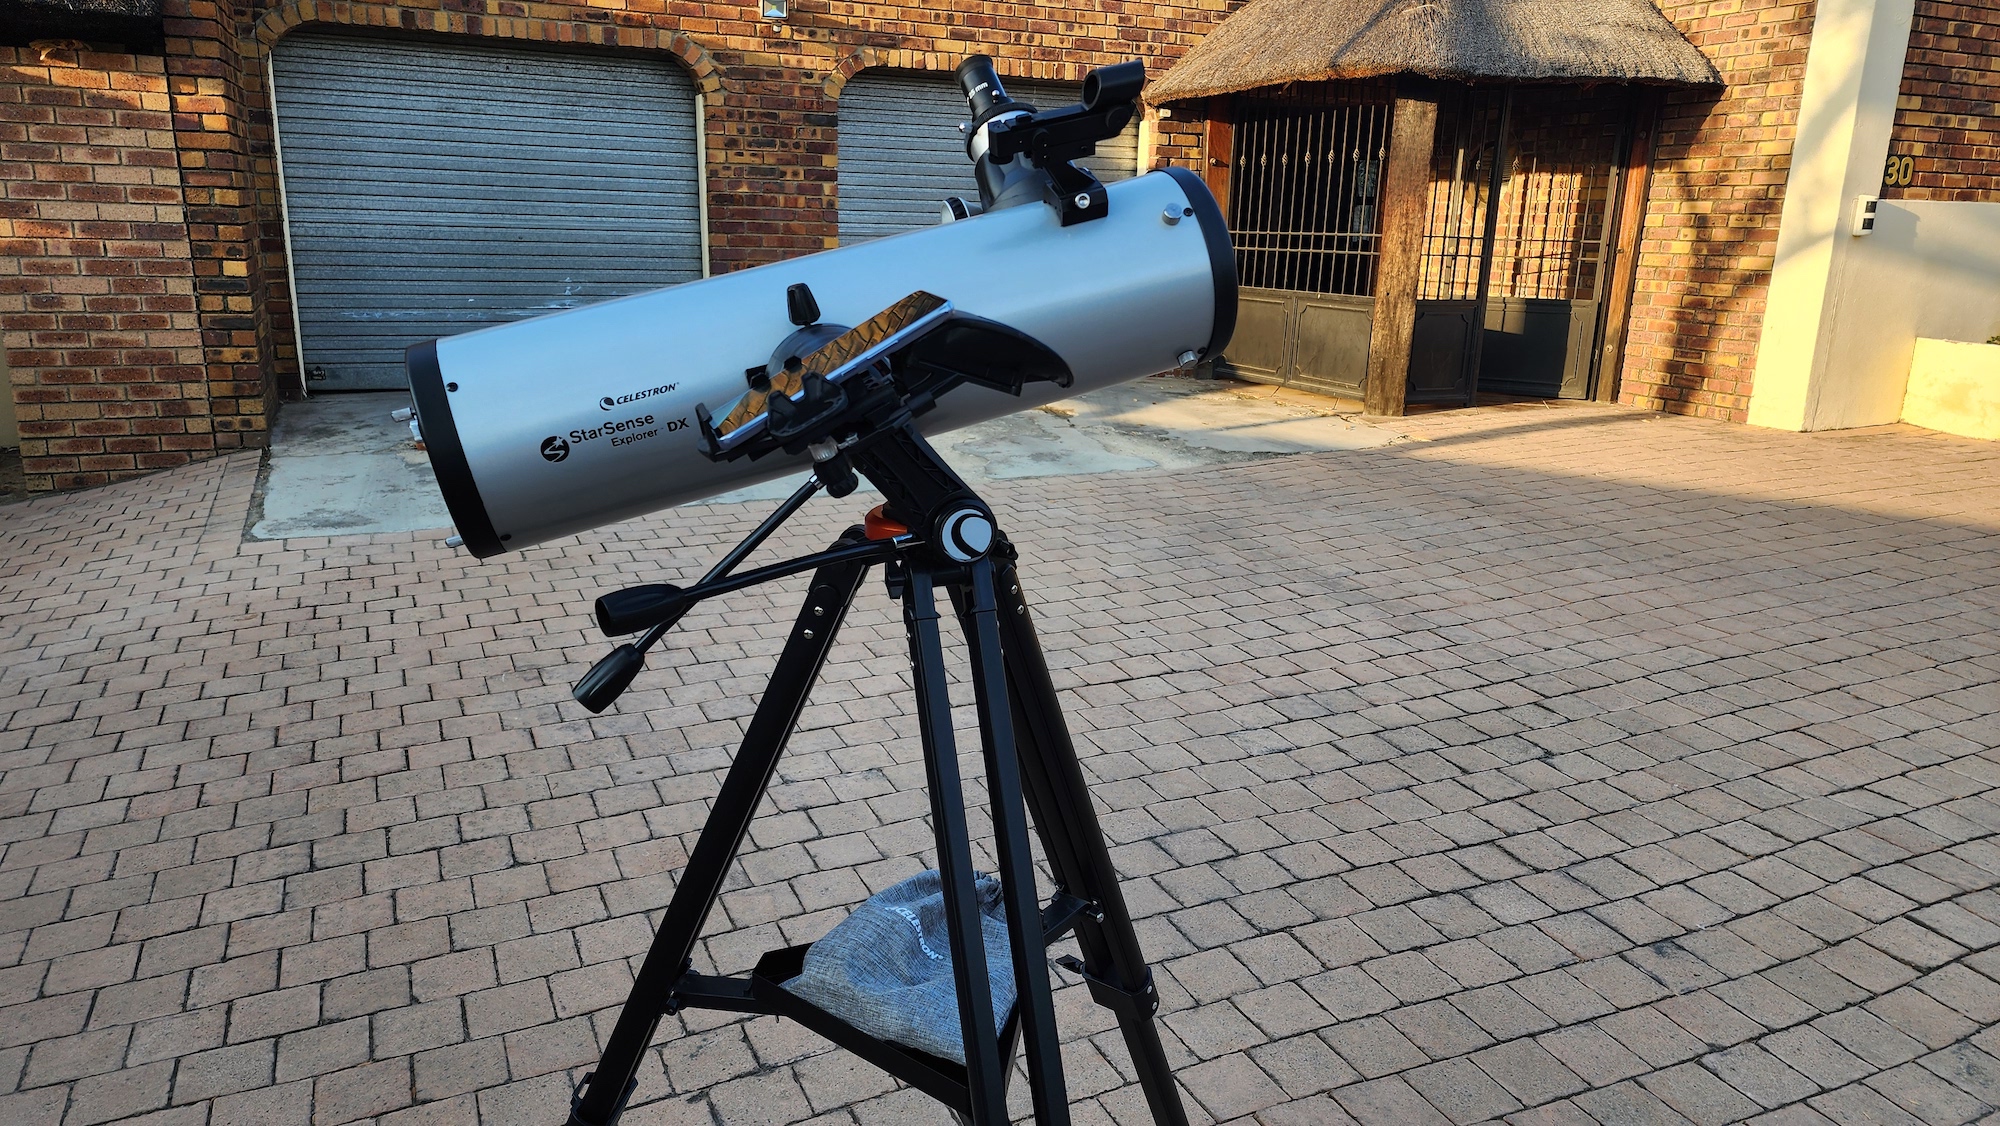
The whole setup is light enough to let you haul it outside and get observing in less than five minutes unless you’ve got to navigate stairs. But this too has its issues. The tripod was too lightweight for our tastes, resulting in excessive shake when the slow-motion controls were used or the tube was bumped. This can be damped down by adding weight to the tripod (we left a 4kg kettlebell on the tray) but you could also swap the legs out for wooden ones if you’re a handy sort. The alt-az mount would benefit from that sort of modification, or from the stainless steel legs from one of Celestron’s SLT mounts. More stability is always better.
Finally, there’s eye placement. What isn’t explained when you buy one of these is that, with the tripod fully extended, you’ll probably need a stepladder to get up to the eyepiece. This is especially true if you’re observing objects near the zenith (directly overhead). You can solve this problem by leaving the tripod unextended and sitting next to it but that’s not always possible. Sometimes there are houses or ground-based obstacles in the way. A stepladder is an excellent addition to this telescope. Trust us.
A night under the stars
So it’s easy enough to find a target but what does it look like? It’s time to manage some expectations — don’t expect anything like those astrophotography images that you’ve seen online. Those are created with long exposures and very high-end systems. The naked eye doesn’t do that. That said, the Celestron StarSense Explorer DX130 is an apprentice light-bucket and it’ll perform extremely well for larger planetary objects and wide-field, low-power work.
Open clusters, Messier objects, and even some nebulae are within reach but, again, don’t expect brilliant colours and hues. We spent the majority of our low-power views for this review on Herschel’s Jewel Box, an open cluster currently visible in South Africa’s southern sky. At 72x magnification (the equivalent of a 9mm eyepiece in this telescope system), there was clear separation and depth in the cluster, with hints of the stars tucked away further out of sight. All of the major stars and many of the minor ones were visible from Johannesburg. That’s… a big deal, given the city’s light pollution, and we’d expect much better performance from darker skies.
But not if you’re using the stock eyepieces. Celestron supplies 25mm and 10mm Kellner eyepiece, single-coated (by the blue hue of the glass) three-element eyepiece designs that are affordable but inexpensive. It’s possible to find highly-polished and optically fine Kellners but that’s not what Celestron is packing here. You’ll get fair low-power views from the 25mm and decent medium power from the 10mm but users will want to replace these as soon as possible. The Kellner design is known for internal reflections on brighter objects, which can be distracting. Even something as simple as dust on the glass surface introduces light scatter. The simple design and cheap construction make for more washed-out views than might be attained with something a little more… premium. Heck, even a vintage Kellner performs better.
We used several different eyepiece designs — vintage Japanese Kellners provided much sharper images with the 130mm OTA and several well-corrected orthoscopics elevated the bar even further. We stuck a few more advanced designs into the focuser but you don’t need to go that far. An excellent upgrade path, and one we’d recommend immediately, is a 25mm Plossl (available from R400) and a new 10mm eyepiece. A surprisingly good option is the 10mm Svbony aspheric (R300) but ignore the other two (4mm and 23mm) in the series. They’re not nearly as good. If your budget stretches, the Svbony 10mm ultra-flat (R1,340), a clone of the Celestron Ultima Edge, is an excellent choice for this reflector. You’ll also want a Barlow lens (R390) for doubling the magnification of these eyepieces.
With this setup — you could just purchase the Barlow to start — users have magnifications of 26x (25mm), 52x (25mm+Barlow), 65x (10mm), and 130x (10mm+Barlow). Newtonian reflectors are a little weird, however, and you’ll be best served by Plossl eyepieces as upgrades. The next upgrade step is for very well-corrected eyepieces, which will run upwards of R5,000 each. Playing in the space between calls for a coma corrector to prevent blurred star images. Cheaper eyepieces may also display field curvature, visible as seagull-shaped stars at the edge of the field. Plossls should handle themselves admirably and Celestron’s Omni lineup is also available locally if you’re keen to keep your upgrades in-house.
Celestron StarSense Explorer DX130 AZ verdict
The Celestron StarSense Explorer DX130 AZ is an excellent choice for serious beginners looking to jump in and start observing without too much studying beforehand. You don’t need to star-hop at all (though the red-dot sight makes it an option) and Celestron’s OTA is an excellent performer at low-power, wide-field viewing. It’s also got enough aperture and reach to make lunar observing and views of the gas giants crisp and clean, though you’ll very rarely want to push it over 200x despite what Celestron itself claims.
There are some issues to be aware of. The stock tripod could be stiffer and Newtonians are sometimes finicky to deal with. Collimation will be a part of your life but it’s a useful skill to learn if you’re fond of excellent views of the night sky. Astrophotography isn’t an option with this setup at all — the mount isn’t set up for it — but you’ll see some truly epic views of the skies above South Africa if you happen to have one in your home. Ease and speed of setup can stand in for some of the drawbacks here. You’re more likely to use a telescope that can be whipped outside in a hurry and it doesn’t get much quicker than this. Just… upgrade the stock eyepieces as soon as you can, yeah?


