
So, you just treated yourself to a new Windows laptop. Now what? Well, after you’ve taken it out of the box and plugged it in, there are a few things we suggest you do to make your road ahead as easy as possible.
It should be noted that we’ll be exclusively covering new Windows laptops. Macs are a whole different story that we won’t be touching here. We will also make sure not to get too technical. You won’t need to go digging through your registry, run any dodgy scripts or give up your firstborn. Some of these steps might even seem obvious to you. If that’s the case, then well done, we’re proud.
Get with the times
Once you’ve opened your shiny new laptop and gone through the initial out-of-box setup, the first thing to do is to check for updates. Laptops are usually manufactured at least a few months prior to them ending up in your hands. That means you will have missed out on some rather important Windows security updates and maybe even a feature update or two.
 Hit the start button – the button between left control and alt – and just start typing ‘updates’. You should see a ‘Check for Updates’ result. Click on that and start those updates. You’ll likely have to restart a few times, but rather do that now than in the middle of a Zoom call.
With the introduction of Windows 11, Microsoft has started integrating updates for Original Equipment Manufacturers (OEMs) within Windows update. But it’s still a good idea to head over to the manufacturer’s website if your laptop has RGB or any other fancy features you’ll want to make use of. You spent all that money, might as well.
Get rid of the bloat
The next step is to trim the fat. Almost every laptop will come with at least one program that you’ll never use, usually more. Sometimes these are harmless and sometimes they can be incredibly annoying or even slow your machine down. It’s better to do away with them now while the list is short.
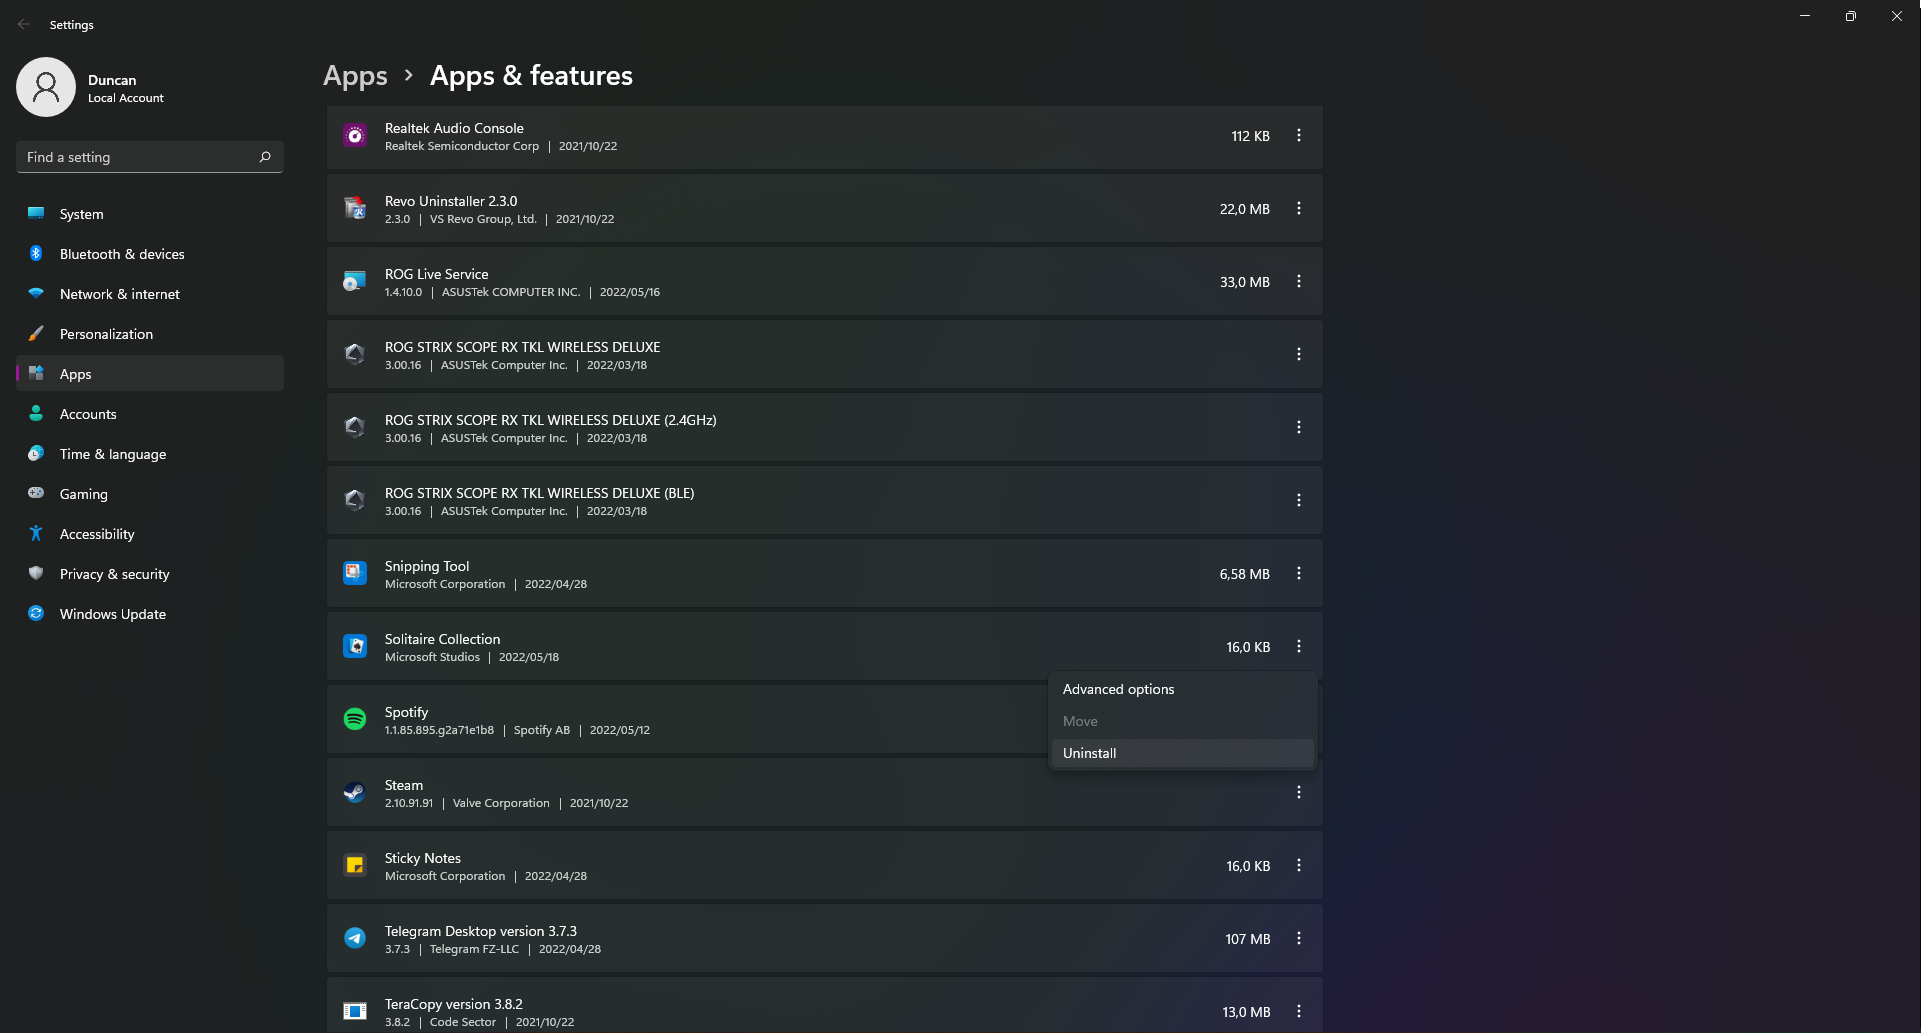 Hit that start button again and start typing ‘Add or remove programs’. Before long, you’ll see a result with the same name. Tap that and go through the list. You’re looking for things like McAfee, Norton or any other pre-installed anti-virus trial that came with the laptop.
We’re not saying you shouldn’t use one, but there are plenty of options that’ll perform better without cluttering up your machine with annoying pop-ups. Eset Security and Kaspersky come to mind. There’s also usually a Microsoft Office trial hidden there somewhere. If you aren’t planning on purchasing that, you can get rid of it for now. Click the kebab menu and select ‘uninstall’.
Now the genuine work can begin
 Next, you’ll want to start downloading and installing the programs you’ll need daily. But before you do that, head over to ninite.com. This site offers most of the basic programs you’ll use every day. A web browser, VLC for movies, Spotify for music and Steam for games. Tick the ones you want and the installer will download and install the latest version of the programs. It will also skip any restart requests, but when it’s done, it’s a good idea to restart anyway.
And that’s it. Now you’re in a pretty good starting position. Just remember to update when it asks you to. If you’re looking for a few more things to do that will speed up your boot times or maybe you want to customise your Windows experience, here are a few optional quick-fire tips.
If you’re a fan of efficiency, then hit control + shift + escape to open up the task manager. Go to the ‘startup’ tab and disable the programs that appear here that you don’t need the second you power up your laptop. These can sometimes have a big impact on your boot times.
Speaking of efficiency, that extra button press you’re subjected to when you boot up? Yeah, that needs to go. If you don’t mind saying goodbye to the nice wallpaper and inspirational quotes, disable the Windows lock screen. Hit that start button again and type ‘gpedit’. You should see the best match result that says “Edit group policy”. This might only show up if you’ve got the Pro edition of Windows. Home users will have to dive into the registry and that’s a no-no for this guide.
Call yourself an Administrator
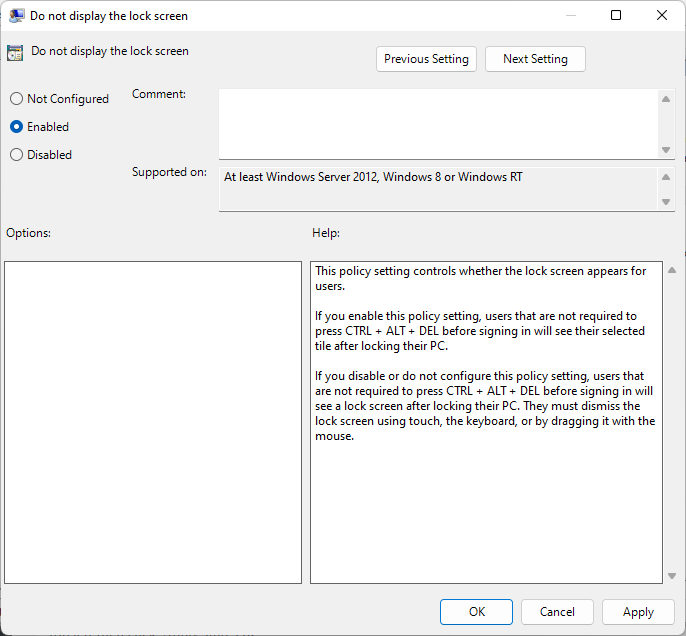
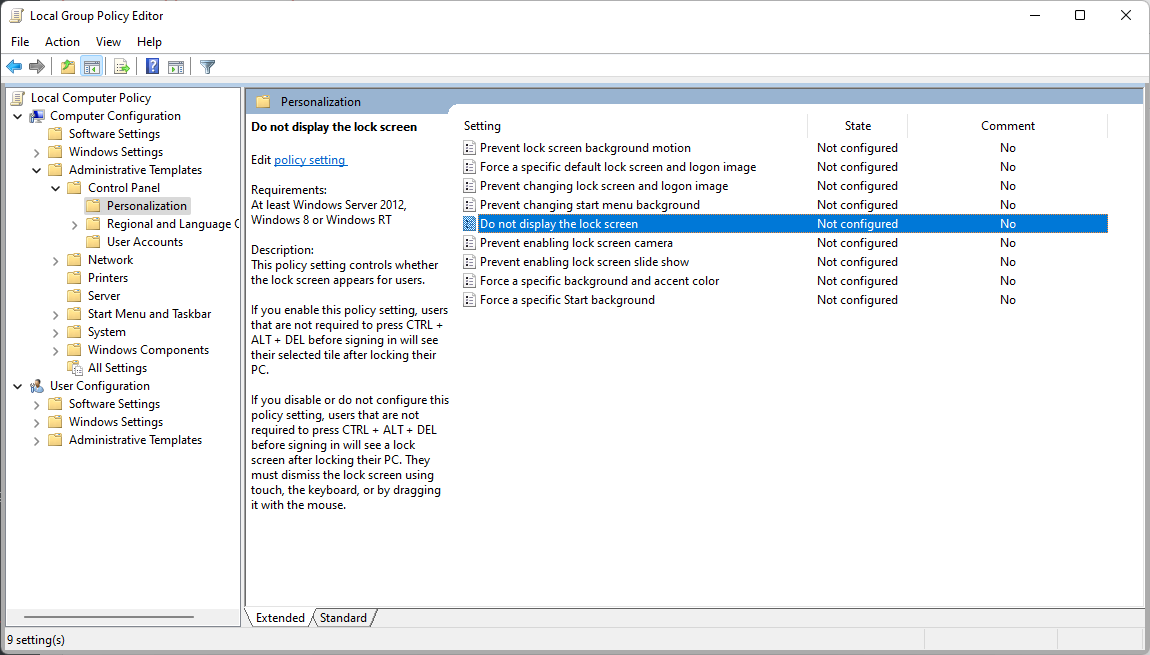 Click “Edit group policy”, then in the list on the left, look for Computer Configuration. Head to the Administrative Templates folder just underneath, then Control Panel, then Personalisation. Now, on the right of that window, you’ll see a list. Look for ‘Do not display the lock screen’. Double click that, check the ‘Enabled’ option near the top left then click ‘Apply’ and ‘OK’.
Now, you’ll be taken right to your login tile where you can input your password or just sign in if you live dangerously. You’ve saved a whole button press. You’re welcome.
All that’s left to do now is find a good wallpaper to add a personal touch to your new machine. Wallhaven.cc is a good place to start. Or you could just use a picture of your dog.


